Premiere Pro Gradient Text: Complete 5-Step Guide (2026)
If you are trying to add a gradient fill to a standard subtitle track in Adobe Premiere Pro, stop hitting your head against your desk. Adobe explicitly locks color gradient controls on native caption
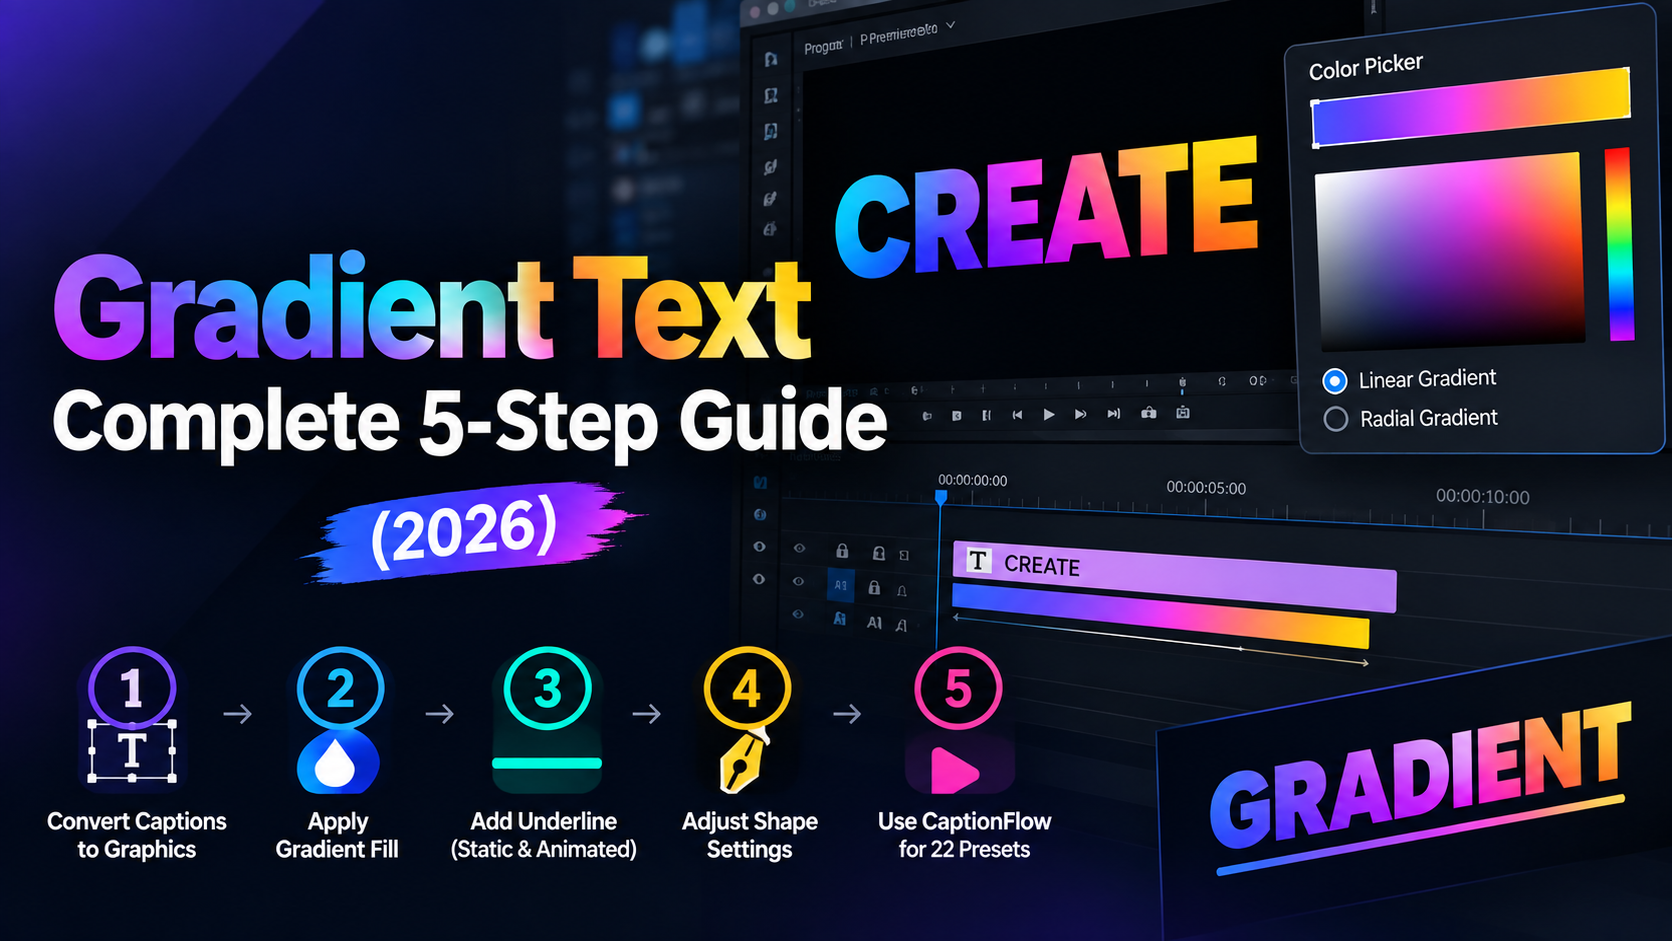
If you are trying to add a gradient fill to a standard subtitle track in Adobe Premiere Pro, stop hitting your head against your desk. Adobe explicitly locks color gradient controls on native caption clips. You can burn 4 hours manually drawing vector lines and keyframing individual subtitles across a 30-minute podcast. Or you can upgrade your captions to graphics and ship a high-end design in under 90 seconds.
In this guide, I will walk you through the exact steps to convert native subtitles, build custom Linear and Radial gradients, draw custom vector underlines, and animate horizontal scale keyframes without distorting your stroke thickness.
Key Takeaways
- Standard subtitle tracks must be converted via Graphics and Titles > Upgrade Captions to Graphics before applying advanced fills, gradients, or vector lines [3].
- Adobe Premiere Pro supports both Linear and Radial Gradients inside the Color Picker, complete with adjustable top opacity stops and bottom color stops [1], [2].
- One-click text underlines work for static titles in Essential Graphics, but animated underlines require drawing a vector shape with the Pen Tool (shortcut P) [6], [7].
- Always uncheck Uniform Scale in Effect Controls when animating an underline shape path so the line expands horizontally without stretching line thickness [7], [8].
- Repositioning the shape anchor point to the left edge changes the underline animation origin from center-out to a crisp left-to-right sweep [7].
- You can bypass manual keyframing entirely by using KreateFlo's CaptionFlow tool to render 22 animated caption presets in real time [10].
The Trap of Standard Captions (Why You Must Upgrade to Graphics)
When you generate automatic transcripts in Adobe Premiere Pro, the app dumps those captions onto a dedicated Subtitle track at the top of your timeline. It looks convenient. But the moment you try to style those words with vibrant multi-color ramps or custom vector accents, you hit a brick wall.
Standard Subtitle Track Limitations in Premiere Pro
Native subtitle tracks in Premiere Pro exist for traditional broadcast closed captions and basic SRT exports. Because of this architectural constraint, Adobe limits their formatting options to simple solid text fills, basic strokes, and rigid rectangular background boxes [3].
You cannot apply the Ramp effect to a standard subtitle clip. You cannot add multi-color gradients inside the Properties panel. And you certainly cannot draw custom vector underlines that snap to specific words on a subtitle layer [3].
Renders stay flat. If you want your long-form interview clips or short-form social reels to stand out, relying on standard subtitle styling will keep your content looking amateurish.
How to Use 'Upgrade Captions to Graphics'
To unlock
- Highlight all caption clips on your timeline subtitle track (or select the specific clip you want to style).
- Go to the top menu bar and select Graphics and Titles > Upgrade Captions to Graphics [4].
- Premiere Pro will process your subtitles and move them down onto a standard video track (such as V2 or V3) as Essential Graphics layers [3].
Now, your captions behave like standard graphic titles. You can apply keyframes, stack vector shape layers, adjust individual character strokes, and build custom color gradients without restrictions [4].
Actionable Takeaway: Never attempt to style complex text captions directly on a native subtitle track; select your clips and click Graphics and Titles > Upgrade Captions to Graphics first to unlock full visual controls [3], [4].
Creating Gradient and Underline Text Captions in Premiere Pro: Essential Setup
Once your captions sit on a standard video track, you need to configure your workspace so you can modify shape properties efficiently. Working without the right panels open leads to missed text selections and frustrating rendering errors.
Accessing the Essential Graphics and Properties Panel
Open your workspace menu by selecting Window > Workspaces > Captions and Graphics (or Titles & Graphics depending on your Premiere Pro build) [1].
In recent updates to Adobe Premiere Pro, Adobe introduced the unified Properties panel alongside the classic Essential Graphics panel [1]. Both panels allow you to modify text parameters, but the Properties panel
Preparing Your Text Box and Program Monitor Selection
Here is a mistake I see editors make every day: they click an upgraded graphic clip on the sequence timeline, open the Color Picker, change the fill setting, and wonder why nothing happens in the Program Monitor [2].
Timeline clip selection alone does not target the internal text layer [1]. You must perform these exact actions:
- Double-click the upgraded graphic clip in your sequence to place the playhead over it.
- Grab the Type Tool (shortcut T) or the Selection Tool (shortcut V).
- Click directly inside the text box in the Program Monitor so the blue bounding box and cursor highlight the characters [2].
Only when the specific text characters or text layer bounding box are active will your gradient adjustments render in real time [1].
Pro Tip: If double-clicking text in the Program Monitor accidentally moves the graphic alignment, lock your background video track (V1) so you only target the text layer sitting on V2.
Actionable Takeaway: Always double-click the specific text box inside the Program Monitor after highlighting a graphic clip, ensuring text controls are actively linked to your design panels [1], [2].
How to Build Custom Linear and Radial Gradient Fills on Upgraded Captions
With your text target selected, you can replace boring flat white fills with dynamic multi-color gradients that draw the viewer's eye directly to key spoken words.
Configuring Linear vs Radial Gradients in the Color Picker
Highlight your text layer and navigate to the Text section inside the Essential Graphics or Properties panel [2]. Locate the Fill color chip and click it to open the Adobe Premiere Pro Color Picker window [1].
At the top-left corner of the Color Picker dialog box, click the dropdown menu currently set to Solid [1]. You will see two gradient alternatives:
- Linear Gradient: Blends two or more colors along a straight directional line, ideal for modern metallic, pastel, or vertical pop-style text [8].
- Radial Gradient: Expands color outward in a circular pattern from a central focal point, perfect for glowing word highlights or rounded title badges [5].
Select Linear Gradient to reveal the interactive gradient slider at the bottom of the window [1].
Sampling Video Footage with the Eyedropper for Cohesive Colors
Uncoordinated color choices will ruin an otherwise clean video edit. To ensure your text captions match your camera grade, click the Eyedropper tool inside the Color Picker window [9].
Hover over your Program Monitor and sample key color points directly from your footage—such as ambient studio lighting, a brand logo in the background, or a primary wardrobe accent [9]. Assigning those sampled colors to your gradient color stops creates an instant visual connection between your text overlays and the underlying footage [8], [9].
Adjusting Angles and Adding Extra Color Stops
The Color Picker slider utilizes two distinct sets of control points:
- Top Stops (Opacity): Adjust opacity from 0% (transparent) to 100% (fully opaque) [1], [5]. Slide these to fade gradient edges into background footage.
- Bottom Stops (Color): Define specific color hues [1], [2]. Double-click a stop to change its hex code, or drag it horizontally to alter color distribution.
To build a three-color or four-color gradient, click anywhere along the empty bottom edge of the slider bar to insert new color stops [1]. To adjust the flow direction of a Linear Gradient, modify the Angle field by entering precise degree values (for instance, 90° for a top-to-bottom blend) or dragging the blue interactive text [8].
Actionable Takeaway: Use the Color Picker's bottom stops to add custom hues sampled directly from your background footage with the Eyedropper tool, setting the angle to 90 degrees for a clean vertical shift [1], [8], [9].
Underlining Text in Premiere Pro: Quick Formatting vs Custom Pen Tool Line
Underlining critical words in captions reinforces speech cadence. It helps viewers retain key information during fast-paced social scrolling. However, Premiere Pro offers two vastly different methods for adding underline accents.
Using the One-Click Underline Style Button
If you need a quick, static underline for a lower-third title or simple text block, Premiere Pro includes a native toggle button.
Highlight your text inside the Program Monitor, open the Essential Graphics panel, and look under the Text formatting group [6]. Next to the Bold and Italic toggles, click the Underline ('U') icon [6]. Premiere Pro will instantly generate a thin stroke directly underneath your selected characters.
The upside is speed. It takes a single click [6]. But the catch? Control is non-existent. You cannot animate the line drawing on screen, you cannot change the line's vertical offset relative to the text baseline, and you cannot style the line with a separate color gradient from the text [6], [7].
Drawing a Precise Underline Path with the Pen Tool (Shortcut P)
For custom line thickness, independent gradient fills, or animated line sweeps, you must draw a dedicated vector shape [7].
Here is the exact step-by-step workflow:
- Select your upgraded caption graphic clip on the timeline [4].
- Press P on your keyboard to activate the Pen Tool [7].
- Move your cursor to the Program Monitor, position it slightly below the first letter of the target word, and click once to place an anchor point [7].
- Hold down the Shift key to lock your stroke to a straight horizontal line and click below the last letter of the word [7].
- Open the Shape controls in Essential Graphics, uncheck Fill, check Stroke, and set your desired line thickness in pixels [7].
Because this vector line lives as a shape layer inside the same Essential Graphic clip as your text, your project timeline stays clean without cluttering additional video tracks [4], [7].
Actionable Takeaway: Reserve the one-click 'U' button for static titles, but use the Pen Tool with Shift held down to draw customizable horizontal vector shapes for high-impact words [6], [7].
Animating Underline Captions with Scale Keyframes and Easing
A static underline works fine, but an animated underline that writes itself across the screen precisely as the speaker says a word dramatically boosts engagement.
Unchecking 'Uniform Scale' and Repositioning Anchor Points
By default, Premiere Pro scales graphic shapes uniformly across both height and width. If you keyframe standard scale on a drawn line, the stroke thickness will start paper-thin and grow fat, producing a distorted vector box [7].
Select your drawn line shape inside the Effect Controls panel under the Graphic > Shape section [7]. Locate the Scale property and click the checkbox next to Uniform Scale to uncheck it [7], [8]. This splits your scale parameters into Scale Height and Scale Width [7].
Next, look at your Program Monitor. You will see a small crosshair icon—the Anchor Point—in the center of your drawn line [7]. Grab the Anchor Point gizmo and drag it to the far-left edge of your vector stroke [7]. Repositioning this origin point ensures your line grows outward from left to right instead of expanding awkwardly from the middle outward [7].
Keyframing Horizontal Scale from 0% to 100%
Now you can keyframe the underline animation along the sequence timecode:
- Move your timeline playhead to the exact frame where the speaker begins pronouncing the target word [7].
- Under your Shape parameters in Effect Controls, click the stopwatch icon next to Scale Width to create a keyframe [7].
- Change the value from
100.0%to0.0%[7]. - Advance the playhead to the frame where the word pronunciation finishes [7].
- Increase the Scale Width value back to
100.0%[7].
Play back the clip. Your underline now draws smoothly beneath the word in sync with the spoken audio track [7].
Applying 'Ease In' for Smooth Motion
Linear keyframes produce abrupt, mechanical movement. To make your underline animation feel natural, add temporal keyframe interpolation [7].
Right-click the second Scale Width keyframe (the 100% point) on your Effect Controls timeline [7]. Select Temporal Interpolation > Ease In [7]. This causes the drawing speed to gently decelerate as the line reaches its final width, eliminating harsh keyframe stops [7], [8].
Pro Tip: Hold Cmd (macOS) or Ctrl (Windows) while dragging the line anchor point in the Program Monitor to force it to snap precisely to the left vector vertex.
Actionable Takeaway: Always uncheck Uniform Scale in Effect Controls and move the shape's anchor point to the far-left vertex before keyframing Scale Width from 0% to 100% with an Ease In finish [7], [8].
Batch Applying Gradient Fills Across Whole Timeline Tracks

Styling a single 5-second short-form clip is easy. Applying custom gradient text and underline highlights across a 45-minute multi-cam interview sequence will consume your entire afternoon if done manually.
Copying Effects and Styles Across Multiple Upgraded Clips
Once you perfect a gradient text style on one upgraded graphic clip, you can copy its properties across hundreds of timeline clips in seconds [3].
Highlight your master styled graphic clip on the sequence timeline and press Cmd+C (macOS) or Ctrl+C (Windows) [3]. Next, drag a selection box over every upgraded caption clip across your timeline track, right-click, and choose Paste Attributes [3]. Ensure Text Properties and Motion/Effects are checked, then click OK [3]. Premiere Pro will copy the gradient fills and font formatting across your entire edit [3], [10].
Using Background Shape Layers for High-Contrast Captions
Gradient text can blend into bright or busy background footage, making speech difficult to read. You can fix this by introducing high-contrast backing shapes [3].
Inside your Essential Graphics panel, click the New Layer icon (the paper icon with a folded corner) and select Rectangle [3]. Drag the rectangle layer beneath your text layer inside the panel list so it sits behind the letters [3]. Apply a dark solid fill with 40% to 60% opacity, or use a dark Linear Gradient that fades to transparent [3], [8].
Alternatively, duplicate your video footage down to track V1, apply the Ramp or Color Balance effect, and drop opacity slightly so your V2 gradient captions pop with maximum legibility [3], [10].
Actionable Takeaway: Master your initial caption design on one clip, then copy and paste attributes across all upgraded timeline clips to batch-apply text properties instantly [3], [10].
Creating Gradient and Underline Text Captions in Premiere Pro with AI Automation
Let's be completely honest. Manually drawing vector lines, adjusting anchor points, unchecking uniform scale boxes, and placing keyframes across hundreds of words in a long podcast edit is exhausting. It works for bespoke titles. But it kills your editing velocity when client deadlines are tight.
Bypassing Manual Keyframing with Premiere Plugins
Many editors turn to external web apps or round-trip tools like Descript or Opus Clip to handle animated text captions. But leaving your timeline creates a mess. You break your sequence organization, lose master multi-cam handles, and waste time exporting heavy video files back and forth.
Other Premiere plugins like FireCut offer caption tools, but charge per-hour AI fees. Those fees rack up fast when processing long podcasts week after week. If you edit daily in Adobe Premiere Pro, you need timeline-native automation that stays inside your NLE without per-hour penalties.
Using KreateFlo's CaptionFlow for Real-Time WASM Preset Previews
If you want to move faster, KreateFlo changes the math for working video editors.
KreateFlo is a lightweight CEP extension built specifically for Adobe Premiere Pro (current version v1.0.3). Instead of forcing you into web portals, KreateFlo embeds 33+ specialized editing tools directly inside your Premiere Pro panel workspace.
For caption generation and styling, KreateFlo features CaptionFlow—a dedicated tool loaded with 22 animated caption presets [10].
Here is why CaptionFlow speeds up your edit:
- Instant WASM Real-Time Previews: Built on WebAssembly technology, CaptionFlow lets you hover over and preview animated text styles, custom gradients, and word-by-word underline sweeps directly inside Premiere Pro without waiting for background render loops [10].
- Word-Level AI Underlining: CaptionFlow transcribes your video audio across 40+ languages (including English, Spanish, Bangla, and Hindi) and applies word-by-word highlighted underlines without requiring a single manual keyframe [10].
- Predictable Pricing: FireCut charges by the hour. KreateFlo gives you a permanent Free Tier featuring 3 tools forever (Silence Remover, Transition Assistant, and Copy & Paste). When you need full AI transcription and CaptionFlow animations, Pro is just $19.99/mo (20 AI hours) and Studio is $44.99/mo (50 AI hours).
When KreateFlo is NOT the right pick: KreateFlo is strictly an Adobe Premiere Pro CEP extension. If your primary NLE is DaVinci Resolve or Final Cut Pro, KreateFlo will not run on your system. Furthermore, if you only edit one simple 30-second clip per month, paying for an automated plugin doesn't make sense—stick to Premiere's built-in Pen tool [7]. But if you produce 5 to 30 hours of long-form podcasts, interview shows, or short clips every week, automating your text styling will save you hours per project.
For a deeper dive into optimizing your sequence assembly alongside automated captions, check out our guide on automated podcast editing workflows.
Actionable Takeaway: Switch from manual line keyframing to KreateFlo's CaptionFlow tool to apply word-by-word animated underline presets with real-time WASM previews inside Premiere Pro [10].
Common Mistakes When Creating Gradient and Underline Text Captions in Premiere Pro
Even experienced editors run into technical snags when styling text in Premiere Pro. Avoid these four common traps to keep your workflow running smoothly.
Summary of Common Setup Errors & Fixes
| Editing Problem | Root Cause | Quick Fix |
|---|---|---|
| Gradients Grayed Out | Text sits on native Subtitle track [3] | Run Graphics and Titles > Upgrade Captions to Graphics [4] |
| Line Distorts into Thick Block | Uniform Scale checked in Effect Controls [7] | Uncheck Uniform Scale, animate Scale Width only [7], [8] |
| Underline Grows from Middle | Anchor point centered on shape path [7] | Move shape Anchor Point to the far-left vertex [7] |
| Robotic Animation Motion | Default linear keyframe interpolation [7] | Right-click keyframe, set to Temporal Interpolation > Ease In [7] |
| Gradients Won't Render | Clip selected on timeline, but text box inactive [2] | Double-click text directly in Program Monitor [1], [2] |
Actionable Takeaway: Review your Effect Controls setup before keyframing—ensure Uniform Scale is unchecked and your shape's anchor point sits on the far-left edge [7], [8].
Streamline Your Text Caption Editing Today

Creating custom gradient and underline text captions in Premiere Pro gives your long-form podcasts and short-form reels a high-end visual edge. While manual keyframing and shape styling work well for single titles, doing it line-by-line across hours of video will burn out even the fastest editors.
If you want to automate your workflow, try KreateFlo's free tier or explore our CaptionFlow feature page to apply 22 animated text presets instantly [10]. Head over to our download page to install the extension directly into Adobe Premiere Pro and speed up your edits today.
Frequently Asked Questions
How do you add a gradient fill to text in Premiere Pro?
First, select your caption track and go to Graphics and Titles > Upgrade Captions to Graphics [4]. Highlight the text layer in the Essential Graphics or Properties panel, click the Fill color chip, change the top-left dropdown from Solid to Linear Gradient or Radial Gradient, and configure your color stops [1], [2].
Can you apply gradient backgrounds to captions in Premiere Pro?
Yes. Upgrade your captions to graphics, then add a background shape layer in the Essential Graphics panel and select a gradient fill [3]. Alternatively, apply the Ramp effect to a duplicate video layer placed directly beneath your text clips [3], [10].
How do you underline text captions in Premiere Pro?
For static text, highlight the graphic clip in the Essential Graphics panel and click the Underline ('U') formatting icon [6]. For animated or custom styled lines, use the Pen Tool (shortcut P) to draw a vector line under the word on the same graphic layer [7].
How do you animate an underline under text in Premiere Pro?
Draw a line beneath your text using the Pen Tool [7]. In Effect Controls, uncheck Uniform Scale, move the shape's anchor point to the left edge, and set keyframes for Scale Width going from 0% to 100% [7]. Apply Ease In to the final keyframe for smooth motion [7], [8].
Why can't I edit caption fills or backgrounds in Premiere Pro?
Standard closed or open caption tracks in Premiere Pro lock advanced styling controls [3]. You must convert them to editable graphic clips first by choosing Graphics and Titles > Upgrade Captions to Graphics from the top menu bar [3], [4].
References
- larryjordan.com/articles/new-gradient-text-in-premiere-pro/
- youtube.com/watch
- youtube.com/shorts/Tnq3x0xj6aQ
- youtube.com/shorts/ayjJy3VkP6Q
- youtube.com/watch
- youtube.com/watch
- youtube.com/watch
- alliandwill.com/blog/how-to-add-color-gradient-in-text-using-premiere-pro
- youtube.com/watch
- youtube.com/watch
- youtube.com/watch
- youtube.com/watch
- sinc-lab.com/files/nguyen2026like.pdf
- ai-media.tv/wp-content/uploads/AI_Media_Whitepaper_Engagement_and_Retention.pdf
- rev.com/blog/ultimate-roundup-closed-captions-statistics
- lemonlight.com/blog/how-video-captions-help-attract-and-engage-more-users/
- 3playmedia.com/blog/studies-find-captions-improve-engagement/
Try KreateFlo free
3 tools forever, 7-day trial on the rest. No credit card to start.
Download KreateFlo