Fix Premiere Pro Captions: 6 Proven Unicode Font Fixes
You spend four hours dialing in a bilingual podcast edit in Adobe Premiere Pro, hit export, and every single accented letter turns into a question mark. Most editors blame Adobe's render engine. But 9
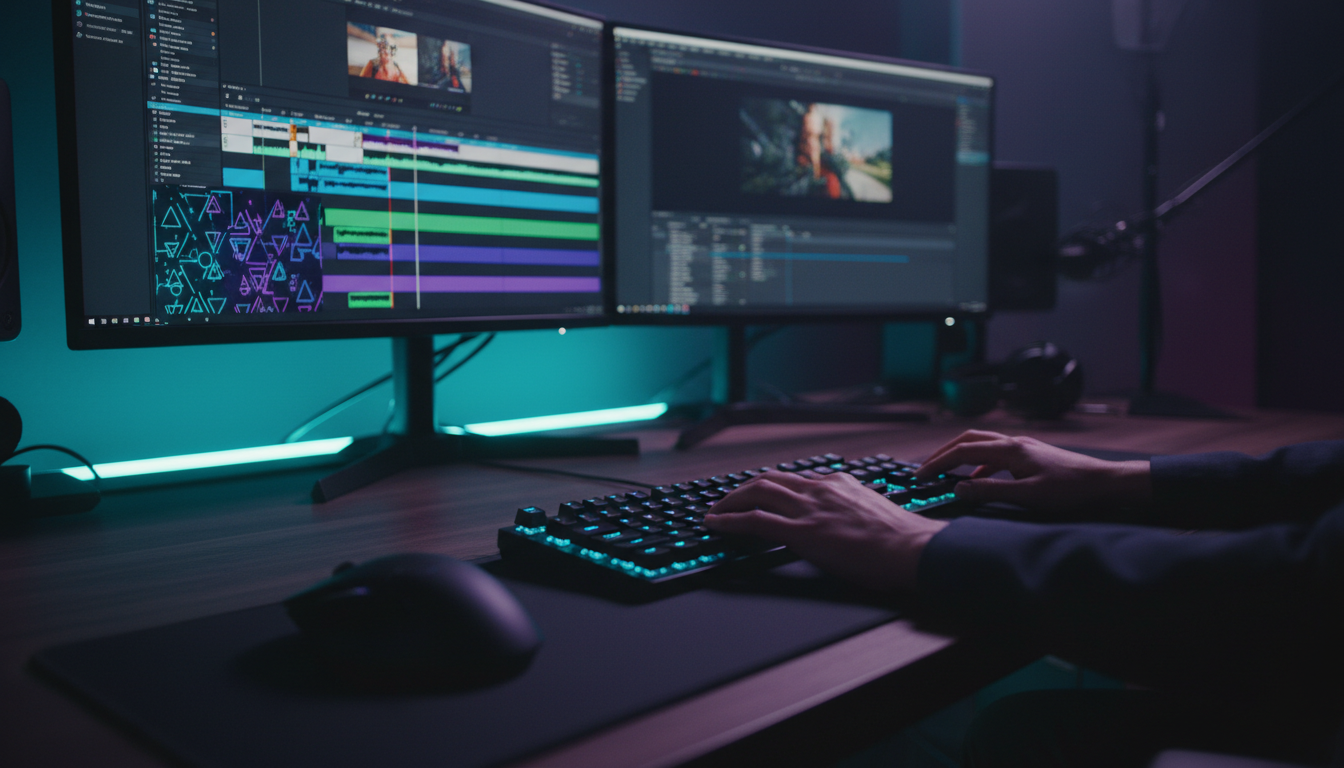
You spend four hours dialing in a bilingual podcast edit in Adobe Premiere Pro, hit export, and every single accented letter turns into a question mark. Most editors blame Adobe's render engine. But 90% of the time, the culprit is simply Windows Notepad silently saving your SRT file in ANSI encoding instead of UTF-8 without BOM.
I used to waste half my workday re-typing line-by-line subtitles or scrubbing timeline clips one by one when this happened. So trust me when I say: you can resolve broken character formatting in about 90 seconds once you understand how text encodings and font glyphs interact inside Premiere Pro.
Key Takeaways
- Re-save corrupted SRT files as UTF-8 without BOM in VS Code or Notepad++ to restore broken accents in under 90 seconds.
- Disable Smart Quotes in Essential Graphics if apostrophes or quotation marks render as empty squares or wide gaps.
- Switch display fonts to broad Unicode-compliant families like Noto Sans or Open Sans when text renders as empty tofu boxes.
- Ensure all SRT timestamp decimals use commas (
00:00:00,000) instead of periods to prevent Premiere Pro import failures.- Use Track Select Forward (
Shift + A) to select all timeline caption clips and apply bulk font styling updates at once.- Increase background expansion from
17.4to20in Premiere Pro 25.4+ to prevent custom font punctuation from clipping on export.
Why UTF-8 Encoding Is the Root Cause of Broken Captions
When you import sidecar captions into a timeline, Premiere Pro acts as a strict parser. It reads the raw byte stream from your subtitle file and maps those bytes directly to character glyphs.
If the underlying byte structure does not match standard character encodings, characters misfire immediately.
[[STAT:90%:caption corruption caused by ANSI encoding]]
Understanding ANSI, UTF-16, and Mojibake Errors
Most video editors generate plain text subtitle files using default system text apps. On Windows machines, standard text editors frequently write plain text files in Windows-1252 or ANSI encoding by default.
When an SRT file contains accented letters like "ã", "ó", "ç", or non-Latin glyphs, importing ANSI-encoded SRT files into Premiere Pro [1] converts those letters into garbled, unreadable text known as "mojibake."
For example, a phrase like "Olá, como está?" saved in ANSI will render as "Olá, como está?" inside the Essential Graphics panel. ANSI simply lacks the index mapping for high-order Unicode character positions [2]. When Premiere Pro attempts to interpret those bytes through its graphics engine, it displays question marks, foreign symbols, or blank boxes.
The Hidden Byte Order Mark (BOM) Trap in SRT Files
Even when you save a file in UTF-8, you can still encounter broken captions if your editor appends a Byte Order Mark (BOM). A BOM is a tiny three-byte sequence (EF BB BF) placed at the absolute start of a text file to signal byte ordering to software.
SRTs are simple character streams. Because of this, having a BOM header in a UTF-8 file causes Premiere Pro to drop the first cue [3] or reject file import entirely. The parser sees those invisible header bytes attached to "Cue 1", fails to recognize the integer "1", and skips the initial subtitle block.
BROKEN (UTF-8 with BOM):
[BOM Header]1
00:00:01,000 --> 00:00:03,000
Welcome back to the show.

CLEAN (UTF-8 without BOM):
1
00:00:01,000 --> 00:00:03,000
Welcome back to the show.
If your captions drop the first sentence on the timeline, an unwanted BOM header is almost certainly hiding at the top of your text file.
Actionable Takeaway: Never save caption sidecars in Windows Notepad using default settings. Always verify your export encoding is set explicitly to UTF-8 without BOM.
Fixing Broken Unicode Characters in Premiere Pro Captions via Text Editors
Fixing corrupted subtitle sidecars does not require re-editing your sequence or manually retyping sentences. You can repair damaged character streams externally in under two minutes using free text editors like Visual Studio Code or Notepad++.
| Before | 90 seconds |
|---|---|
| After | 4 hours |
Re-Saving SRT Subtitles in VS Code or Notepad++
If your timeline text shows broken accents or mojibake, open the source .srt file directly in VS Code or Notepad++. Look at the bottom right corner of the status bar.
If it reads ANSI or UTF-8 with BOM, your file needs a quick conversion.
Here is the exact step-by-step fix:
- Open your SRT file in Notepad++ or VS Code.
- In Notepad++, click Encoding in the top menu bar. (In VS Code, click the
UTF-8orANSIlabel in the bottom status bar and select Reopen with Encoding). - Select Convert to UTF-8 (ensure you choose the variant without BOM).
- Save the file (
Ctrl + SorCmd + S). - Return to Adobe Premiere Pro, right-click the imported SRT item in your Project Panel, select Replace Footage, and point to your newly saved file.
+-----------------------------------------------------------------+
| Step-by-Step SRT Encoding Conversion                            |
+-----------------------------------------------------------------+
| 1. Open .srt in VS Code / Notepad++                             |
| 2. Check bottom bar status (ANSI vs UTF-8)                      |
| 3. Click Encoding Menu -> Select "Convert to UTF-8 (No BOM)"     |
| 4. Save File (Ctrl+S / Cmd+S)                                   |
| 5. In Premiere Pro: Right-click Project File -> Replace Footage |
+-----------------------------------------------------------------+
Your timeline captions will immediately refresh. This restores all original accented characters and tildes without altering your subtitle timing.
Fixing Timestamp Separators (Commas vs. Periods)
Incorrect timestamp formatting is another common reason Premiere Pro fails to parse captions cleanly. The official SRT specification demands a comma as the decimal separator for milliseconds (00:01:23,500).
Many web-based auto-transcription generators incorrectly output periods (00:01:23.500) because they use WebVTT format standards inside an SRT container. Using periods in SRT timestamps causes Premiere Pro to treat the file as invalid [2] or skip random cues across the sequence [3].
To fix this globally in Notepad++:
- Press
Ctrl + Hto open the Replace menu. - Set Find what to
(\d\d:\d\d:\d\d)\.(\d\d\d) - Set Replace with to
$1,$2 - Set Search Mode to Regular expression.
- Click Replace All.
This regex swap fixes thousands of invalid timecode separators instantly across an entire hour-long episode.
Pro Tip: If your subtitle import fails outright, check the first line of timecode in a raw text editor. If you see periods separating milliseconds instead of commas, run a regex find-and-replace before troubleshooting anything else.
Actionable Takeaway: Use regex search-and-replace in Notepad++ to convert period millisecond separators to commas across all SRT sidecar files before importing them into Premiere Pro.
How Font Glyph Compatibility Causes Tofu Boxes and Missing Letters

Sometimes your file encoding is clean, but your text still renders as empty white rectangles or square boxes. In typography, these missing character boxes are called "tofu."
Replacing Incompatible Display Fonts with Broad Unicode Families
Tofu boxes occur when your active font file lacks the specific character drawing (glyph) required for a character.
Popular social media display fonts like Bebas Neue, Impact, or custom bold scripts often include only basic Latin letters (A–Z), numbers, and standard punctuation.
When your script introduces non-Latin characters, Spanish inverted question marks (¿), or CJK (Chinese, Japanese, Korean) characters, missing glyphs render as empty square boxes [4]. The font file simply has no visual design stored for those Unicode addresses.
DISPLAY FONT GLYPH CHECK:
Font: Bebas Neue   -> Glyph 'A' [YES] | Glyph 'ñ' [NO -> TOFU BOX]
Font: Noto Sans    -> Glyph 'A' [YES] | Glyph 'ñ' [YES -> RENDERS CLEANLY]
To resolve missing character boxes:
- Select your caption track on the sequence timeline.
- Open the Essential Graphics panel (or Properties panel in newer Premiere Pro releases).
- Swap the font family to a broad, full-spectrum Unicode font family such as Noto Sans, Open Sans, Arial Unicode MS, or PingFang.
These extended typography families contain tens of thousands of glyph shapes specifically designed to map across global Unicode character sets.
Bulk Updating Timeline Captions Using Track Select Forward
Changing fonts clip-by-clip on a long video sequence is pure busywork. Instead of clicking every block manually, use selection shortcuts.
- Press
Shift + Ato activate the Track Select Forward Tool for a single track. - Click the very first caption block on your caption track to select every subtitle clip downstream simultaneously.
- Open the Essential Graphics panel.
- Change the font, size, or weight.
Updating text formatting while all caption clips are highlighted updates the master styling across your entire timeline in one move.
+-------------------------------------------------------------------------+
| Workflow Comparison: Manual vs Track Select Bulk Update                 |
+-------------------------------------------------------------------------+
| Manual Method:      [Clip 1] -> Edit -> [Clip 2] -> Edit... (45 Mins)  |
| Track Select Method: Shift+A -> Select All -> Single Font Edit (5 Secs) |
+-------------------------------------------------------------------------+
Actionable Takeaway: Switch to a universal Unicode font family like Noto Sans or Open Sans and use Shift + A to apply bulk styling changes across your entire caption track in one click.
Fixing Broken Unicode Characters Caused by Smart Quotes
Even standard English transcriptions can glitch out when special characters like apostrophes and curly quotation marks get processed through legacy graphics engines.
Disabling Smart Quotes in Essential Graphics
Premiere Pro includes a "Smart Quotes" feature designed to automatically convert straight typewriter quotes (') into curved typographic quotes (’).
However, enabling Smart Quotes can cause apostrophes to generate oversized spaces or missing glyph boxes [7] when working with display fonts that lack dedicated smart quote Unicode mappings.
If you notice massive gaps inside words like "don ' t" or "I ' m", or if apostrophes pop up as blank squares:
- Open the Essential Graphics panel.
- Click the small Settings (gear) icon or context menu in the top corner of the panel.
- Locate Smart Quotes and uncheck it.
- Re-type or refresh the text cue.
Disabling this setting forces Premiere Pro to parse standard ASCII straight apostrophes, which are supported by almost every font available.
Adjusting Background Expansion Settings in Premiere Pro 25.x
In Adobe Premiere Pro version 25.4 and later, many editors ran into an annoying export bug: caption text boxes were clipping edge characters, periods, and hanging descenders (like "g", "y", or "p").
| Before | 17.4 |
|---|---|
| After | 20 |
This character clipping happens because the default bounding box calculation on graphic layers cuts off tight against custom font metrics. Increasing the background expansion setting from 17.4 to 20 in the Properties panel [5] expands the rendering padding around the text string.
So if your custom fonts look cut off, this adjustment prevents trailing punctuation, quotation marks, or accented caps from getting shaved off during Final Render.
BACKGROUND EXPANSION FIX (Premiere Pro 25.4+):
Default Value:    17.4  -> [ Clipped Edge Characters on Export ]
Corrected Value:  20.0  -> [ Full Glyph Padding & Clean Render ]
Actionable Takeaway: Turn off Smart Quotes in Essential Graphics and bump your background expansion parameter to 20 in Premiere Pro 25.x to eliminate clipped punctuation and weird text gaps.
Managing Language Packages and Universal Text Engine for RTL and Indic Scripts

Editing multilingual podcasts or international campaigns requires proper language engine configuration. If Premiere Pro lacks the specific language dictionary or rendering engine settings, foreign subtitles fail entirely.
Installing Missing Speech-to-Text Language Packs in Creative Cloud
When using Premiere Pro's native Speech-to-Text engine, transcribing languages like Hindi, Spanish, Japanese, or Russian requires offline language packs.
If you attempt auto-transcription without the correct pack installed, Speech-to-Text transcription fails or drops accented characters[9].
To install missing language packages:
- Save your project and open the Adobe Creative Cloud Desktop application.
- Navigate to Apps > Installed Apps.
- Locate Premiere Pro and click the Add-ons (or Resource Management) tab.
- Scroll through the available Speech-to-Text Language Packs (e.g., Hindi, German, French, Korean).
- Click Install.
Once installed, restart Premiere Pro. The auto-transcription engine will process native character accents and multi-byte words accurately.
+-----------------------------------------------------------------------+
| Creative Cloud Speech-to-Text Language Pack Setup                     |
+-----------------------------------------------------------------------+
| Creative Cloud App -> Premiere Pro -> Add-ons -> Select Language Pack |
| Result: Full native transcript parsing with accurate Unicode accents  |
+-----------------------------------------------------------------------+
Configuring Right-to-Left (RTL) Support for Arabic and Hebrew
Right-to-Left (RTL) languages like Arabic, Hebrew, and Persian, along with complex Indic scripts like Hindi, will render backwards or disconnected if Premiere Pro's text engine is set incorrectly.
By default, standard text engines process text left-to-right. To fix backwards text or broken letter joining:
- Go to Edit > Preferences > Graphics (Windows) or Premiere Pro > Settings > Graphics (macOS).
- Under the Text Engine section, switch the selection from South Asian and Middle Eastern or European to Universal Engine.
- Set your default paragraph direction to Right-to-Left if your primary editing involves Arabic or Hebrew.
- Restart Premiere Pro to register the engine change across your sequence caching.
Premiere Pro's Universal Text Engine supports right-to-left languages and Indic scripts [6] directly inside Essential Graphics, properly connecting script ligatures and preserving reading order.
Pro Tip: If Arabic letters render as disconnected, separate characters rather than cursive words, your text engine is stuck in European mode. Switch to Universal Engine and restart your NLE.
Actionable Takeaway: Always install localized Speech-to-Text packs in Creative Cloud and set your Graphics preferences to Universal Engine when cutting non-English or RTL media.
Fixing Broken Unicode Characters During SRT Import
Even with the correct settings enabled, importing SRT sidecar files can introduce subtle formatting bugs if sequence setup or font synchronization falters.
+---------------------------------------------------------------------------+
| Sidecar Import Checklist for Adobe Premiere Pro                           |
+---------------------------------------------------------------------------+
| [ ] File saved as UTF-8 without BOM                                       |
| [ ] Timecode decimals verified as commas (00:00:00,000)                   |
| [ ] Sequence caption format set to Subtitle / Open Captions               |
| [ ] Universal Text Engine active in Graphics Preferences                  |
| [ ] Target font verified for complete Unicode character mapping          |
+---------------------------------------------------------------------------+
Setting Up Correct Sequence Sidecar Settings
When you drag an SRT file directly from your bin onto a timeline track, Premiere Pro prompts you with the New Caption Track dialog box.
To prevent character corruption and position shifts:
- Set Format to Subtitle (this gives you full control over text positioning, custom font selection, and graphic exports).
- Set Style to None (or select a pre-tested Master Style with broad Unicode font support).
- Match the Timecode setting explicitly to your active sequence frame rate.
Importing an SRT under legacy formats like CEA-608 or CEA-708 strips out modern Unicode accents. Legacy broadcast standards restrict character sets to basic ASCII English text, instantly corrupting foreign script translations [8].
Toggling Adobe Fonts to Clear Font Substitution Bugs
Occasionally, Premiere Pro gets stuck in a font substitution loop where it temporarily replaces custom display fonts with generic monospaced fallback fonts (like Courier or Adobe Clean). This occurs when Creative Cloud loses temporary sync with Adobe Fonts background daemons.
To resolve font substitution glitches quickly:
- Open the Creative Cloud Desktop app.
- Navigate to the Fonts tab in the top right corner.
- Toggle the Adobe Fonts service Off, wait 5 seconds, and toggle it back On.
Toggling Adobe Fonts off and on quickly resolves font substitution bugs [10] without forcing a system reboot or clearing your Premiere Pro plugin cache.
Actionable Takeaway: Always import captions as Subtitle tracks rather than legacy CEA-608 formats, and reset Creative Cloud font sync if typography falls back to generic defaults.
Streamlining Your Subtitle Workflow in Adobe Premiere Pro with AI Tools
Scrubbing SRT files in text editors, re-saving encodings, and manually fixing font glyph bugs takes time away from actual creative editing. If you handle high-volume podcast edits or produce daily short-form content for social platforms, managing manual subtitle tracks becomes a massive bottleneck.
+---------------------------------------------------------------------------------+
| Subtitle Workflow Comparison: Manual Sidecars vs Integrated AI Workflow          |
+---------------------------------------------------------------------------------+
| Step                       | Manual SRT Sidecar      | Integrated Plugin        |
+----------------------------+-------------------------+--------------------------+
| File Encoding Setup        | Manual UTF-8 Conversion | Automatic (Native)       |
| Timestamp Formatting       | Regex Check Required    | Automatic (Native)       |
| Real-time Preview          | Render & Scrub Loop     | WASM Instant Preview     |
| Animated Presets           | Manual Keyframing       | 22 One-Click Presets     |
| Multi-language Support     | External File Import    | 40+ Languages Built-In   |
+----------------------------+-------------------------+--------------------------+
Automated Captions with CaptionFlow and WASM Real-Time Preview
Instead of dealing with sidecar file conversions, we built CaptionFlow directly inside KreateFlo—our CEP extension (v1.0.3) for Adobe Premiere Pro containing 33+ dedicated editing tools.
CaptionFlow bypasses the standard SRT import process completely by generating
Key capabilities in CaptionFlow include:
- WASM Real-Time Preview: Test caption styles, colors, and line wraps instantly inside the extension panel without waiting for Premiere Pro to render graphic previews.
- 22 Animated Caption Presets: Apply word-by-word kinetic animation styles (bounce, highlight, fade, slide) with one click.
- Multi-Language Voice Transcription: Transcribe speech accurately in 40+ languages—including scripts like Bangla and Hindi—without dropping character accents or missing Unicode glyphs.
By keeping the entire transcription and animation pipeline locked inside Premiere Pro, you cut caption creation down from hours of troubleshooting to a simple workflow.
| Before | $19.99/mo |
|---|---|
| After | Per-Hour Billing |
When to Use KreateFlo vs. Standalone Tools
We believe in being honest about tool selection. KreateFlo is built specifically as a CEP plugin for video editors who live inside Adobe Premiere Pro all day.
Here is how KreateFlo compares against alternative workflow tools:
| Feature / Metric | KreateFlo (Pro Plan) | FireCut | Descript | AutoPod |
|---|---|---|---|---|
| Platform Type | Premiere Pro CEP Extension | Premiere Pro Plugin | Standalone Application | Premiere Pro Plugin |
| Pricing Model | $19.99/mo (Flat, 20 AI Hrs) | Per-Hour Credit Billing | $12–$24/mo per user | $29/mo (Single Tool Focus) |
| Multi-Cam Support | Up to 8 Speakers / 8 Cams | Up to 6 Speakers | Text-based Multi-cam | Up to 6 Speakers |
| Caption Animation | 22 Presets + WASM Preview | Static / Basic Animated | Basic Text Overlays | None (Multi-cam only) |
| Free Tier | 3 Tools Free Forever | Trial Credits Only | Free Tier (Watermarked) | No Free Tier |
Honest Caveat: When KreateFlo Is NOT the Right Pick
KreateFlo is strictly an Adobe Premiere Pro extension. If your main editing workflow relies on DaVinci Resolve, Final Cut Pro, or CapCut Desktop, KreateFlo will not work for you.
Furthermore, if you prefer editing video entirely through text documents rather than a traditional multi-track timeline, a standalone tool like Descript might fit your habits better.
But if you want to stay inside Premiere Pro without export roundtrips or per-hour credit anxiety, KreateFlo gives you a complete 33-tool suite—including AI multi-cam editing for up to 8 speakers, silence removal, repeat word removal, and auto-reframing—for a predictable $19.99/mo flat rate on the Pro tier or $44.99/mo for Studio (50 AI hours).
Actionable Takeaway: If you edit podcasts in Premiere Pro daily, stop manually re-encoding SRT sidecar files. Use CaptionFlow inside KreateFlo to generate natively styled, animated captions directly on your timeline.
Frequently Asked Questions
Why are special accented characters showing up as question marks or boxes in my Premiere Pro captions?
This occurs when your SRT file is saved in ANSI encoding instead of UTF-8 without BOM [1, 2], or when your active caption font lacks specific Unicode glyphs [4]. Re-save the file as UTF-8 without BOM in a text editor like VS Code, or switch your caption font to a broad Unicode family like Noto Sans.
How do I change the default font encoding of an SRT file to UTF-8 without BOM?
Open your SRT file in VS Code or Notepad++. In the bottom status bar, click the encoding menu (which often says ANSI or UTF-8), select "Save with Encoding" or "Convert to UTF-8", and choose "UTF-8" without BOM before saving [2, 3].
Why are my auto-captions in Premiere Pro missing foreign language letters or accents?
Missing foreign letters occur when Premiere Pro lacks the specific Speech-to-Text language package [9]. Open the Creative Cloud Desktop app, find Premiere Pro under your installed apps, click Add-ons, and install the required language pack for your target language.
How do I enable Right-to-Left (RTL) text for Arabic or Hebrew subtitles in Premiere Pro?
Go to Preferences > Graphics, and set your Text Engine to "Universal Engine" [6]. Restart Premiere Pro. This enables proper right-to-left line direction and cursive letter ligatures for Arabic, Hebrew, and Indic scripts inside the Essential Graphics panel.
What causes Premiere Pro captions to cut off letters or punctuation on export?
In Premiere Pro version 25.4 and later, custom font background padding can clip edge characters. To fix this, select your caption track, open the Properties panel, and increase the background expansion setting from 17.4 to 20 [5].
Fixing broken Unicode characters doesn't require a total timeline rebuild. Once you lock in UTF-8 without BOM encoding and pick glyph-complete fonts, your captions render cleanly every single time.
If you want to skip manual caption troubleshooting entirely and auto-generate styled, animated subtitles inside Premiere Pro without roundtripping, grab the free tier of KreateFlo today—it includes three professional tools free forever.
References
- community.adobe.com/questions-729/importing-captions-issue-with-special-characters-1398719
- vexascribe.com/how-to-create-srt-file
- vexascribe.com/srt-generator
- facebook.com/groups/BCPANY/posts/2240589169519084/
- community.adobe.com/bug-reports-728/captions-cutting-off-characters-when-using-custom-fonts-1331993
- youtube.com/watch
- youtube.com/watch
- facebook.com/groups/scottishfilmmakersandactors/posts/10158655858035334/
- lokalise.com/blog/what-is-an-srt-file-subtitle-format-explained/
- youtube.com/watch
- jonnyelwyn.co.uk/film-and-video-editing/adding-captions-in-premiere-pro-fix-common-problems/
- unicodetochanakya.com/blog/hindi-premiere-pro-text-breaking-fix
Try KreateFlo free
3 tools forever, 7-day trial on the rest. No credit card to start.
Download KreateFlo