Caption Line Spacing: 5 Essential Vertical Rules (2026)
Your two-line captions are ruining your vertical video watch time. The descenders on 'g' and 'p' are colliding into the top of the next line, making your video look amateur. I wasted 4 hours manually
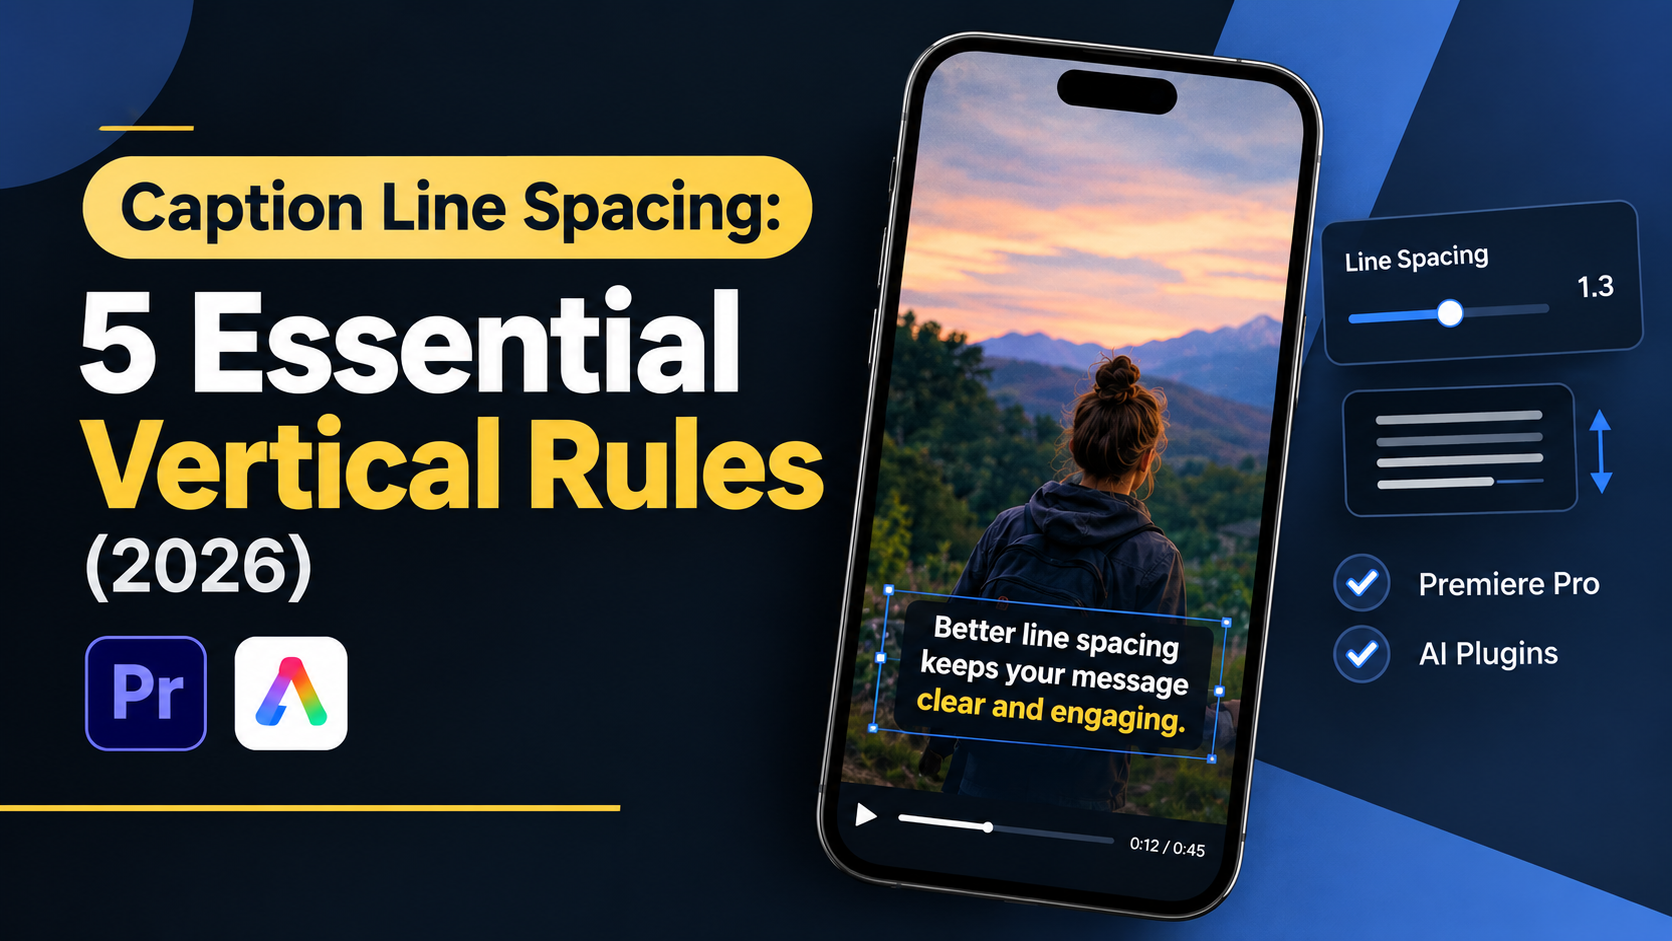
Your two-line captions are ruining your vertical video watch time. The descenders on 'g' and 'p' are colliding into the top of the next line, making your video look amateur. I wasted 4 hours manually fixing leading in Adobe Premiere Pro until I realized traditional broadcast spacing breaks completely on 9:16 screens.
When you cram two lines of text onto a vertical frame, standard line spacing makes your subtitles look like a jumbled wall of text. Viewers scroll past in half a second. Fixing caption line spacing for vertical videos isn't just about typography aesthetics. It directly protects your audience retention curve.
Key Takeaways
Maintain a 1.2x to 1.4x line spacing ratio relative to your font size to eliminate text crowding on portrait screens.
Restrict vertical video captions to 1–2 lines and limit character counts to 25–28 characters per line.
Native Premiere Pro caption tracks lack leading sliders, forcing editors to convert subtitles to graphic text layers or use dedicated extensions.
Enforce a strict 5% safe area margin so app overlays on TikTok, Reels, and Shorts don't cover your captions.
Burned-in open captions guarantee pixel-perfect control, whereas raw SRT sidecar files leave font styling and spacing to third-party video players.
KreateFlo's CaptionFlow tool provides 22 animated presets with real-time WASM previews inside Premiere Pro to eliminate render loops.
Why Bad Leading Ruins 9:16 Video Watch Time
Mobile phone users hold their devices vertically 94% of the time [4]. That shift turned standard widescreen editing on its head.
When you edit a horizontal 16:9 video, you have plenty of left-to-right room for captions. On a portrait 9:16 video (1080x1920 pixels), horizontal space shrinks dramatically [4].
[[STAT:94%:mobile users holding smartphones vertically]]
If you don't adjust your text leading, multi-line captions stack on top of each other. The descenders of letters like "y", "g", and "p" on line one clash into the tall ascenders of "h", "t", and "k" on line two.
That visual noise forces the viewer's brain to work harder to read. On short-form platforms, cognitive friction kills watch time instantly.
In fact, research from Buffer and Animoto revealed that properly formatted vertical videos yield up to a 187% increase in 50% watch time views [5] compared to poorly optimized layouts.
[[COMPARE:187%:watch time boost with vertical captions]]
Broadcast Standards vs. Mobile Frame Real Estate
Legacy broadcast environments follow CEA-608 and CEA-708 standards. Those rules allow up to 32 characters per line [4] or even 42 characters per line on traditional TV screens [2].
Try putting 42 characters on a single line of a portrait video. The font scales down so small it becomes unreadable, or it wraps into four crammed lines.
Short-form vertical guidelines require restricting line length to 24 to 28 characters maximum [4] and capping line count at two [4][6].
The 1.2x to 1.4x Line Spacing Rule
Typography principles suggest maintaining a 1.2x to 1.4x line spacing ratio [10] relative to your chosen font size. If your subtitle font size is set to 60pt, your leading should sit between 72pt and 84pt.
This spacing creates clear negative space between lines. It lets the viewer absorb the text in a single glance without taking their focus away from the speaker's face.
Pro Tip: Keep your total caption display duration between a minimum of 1.0 to 1.3 seconds [4] and a maximum of 6.0 seconds [3]. Anything faster turns reading into a stressful chore.
Actionable Takeaway: Cap vertical line lengths at 25–28 characters and apply a 1.3x leading multiplier to keep text legible.
How to Adjust Caption Line Spacing for Vertical Videos in Premiere Pro
If you edit podcasts or short-form reels daily, you know Adobe Premiere Pro has a major limitation in its native captioning system.
The Native Open Caption Limitation
When you generate auto-captions in Premiere Pro using the Text panel, the software creates a dedicated Subtitle Track.
Look at the Essential Graphics or Text Properties panel for native Subtitle Tracks. You'll notice something frustrating: Premiere Pro offers no leading slider for Open Caption tracks [7].
You can change the font, adjust tracking, and resize the box. But you cannot adjust the vertical line spacing between line one and line two [7].
Editors historically had to manually change the Y-position line by line [7] or duplicate tracks and crop top and bottom lines [7]. That takes hours on a 30-minute interview.
Converting Subtitles to Essential Graphics Text Layers
To unlock real leading controls, you must convert your caption track into native Essential Graphics text layers [1][7].
Here's the exact step-by-step workflow:
Generate your transcript using Premiere's built-in speech-to-text engine [1].
Click Create Captions in the Text Panel [1]. Set max length to 25 characters and max lines to 2 [4].
Select your caption track on the timeline.
Go to the top menu bar and select Graphics and Titles > Upgrade Caption to Graphic [1].
Your caption blocks are now standard graphic text layers.
Using Graphic Styles for Batch Leading Adjustments
Once your captions are upgraded to graphic layers, select one text clip on your timeline and open the Essential Graphics panel [1].
Under Text Properties, locate the Set the Leading numerical slider [1]. Increase the value until your two lines have clear breathing room (aiming for that 1.2x–1.4x ratio) [10].
To apply this to all clips in your sequence:
In Essential Graphics, click the Track Style dropdown.
Select Create Style, name it "Vertical Caption 9x16", and hit OK.
Click the Push to Track or Project icon next to the style dropdown.
In 10 seconds, every text block on your sequence inherits the exact same leading, font size, and background box settings.
Actionable Takeaway: Use "Upgrade Caption to Graphic" in Premiere Pro to unlock the character leading slider, then save a Track Style to push changes across your timeline.
How to Adjust Caption Line Spacing for Vertical Videos using AI Plugins

Upgrading captions to graphics and manually pushing styles works fine for single videos. But when client revisions come back demanding different line wraps, you have to redo the entire conversion pipeline.
Manual layer management easily eats up 20+ minutes per short clip.
That is why we built KreateFlo. It's an Adobe Premiere Pro CEP extension (v1.0.3) designed to handle captioning and vertical video automation natively inside your NLE.
Eliminating Render Loops with CaptionFlow
Most AI caption tools force you to render out video previews on cloud servers just to check if your font leading looks right. If the text clips a speaker's chin, you re-adjust and wait through another render loop.
Inside KreateFlo's CaptionFlow module, we built a WASM-powered real-time preview engine. You can select from 22 animated caption presets and adjust font size, word highlight colors, and line spacing dynamically.
You see exact visual feedback on your NLE canvas instantly without rendering a single temporary video file.
[Traditional Premiere Workflow]
Auto-Caption -> Upgrade to Graphic -> Adjust Leading -> Push Style -> Client Revision -> Repeat (20-30 mins)

[KreateFlo CaptionFlow Workflow]
Auto-Transcribe -> Select Preset -> Adjust WASM Live Leading Slider -> Export (90 seconds)
Setting Character Limits and WASM Real-Time Previews
CaptionFlow lets you lock character limits between 15 and 28 characters per line directly before generating captions [4]. You don't have to manually split long sentences after the fact.
Our transcription engine supports 40+ languages, including Bangla and Hindi. If you produce international content or localized client work, the leading and character limits adjust automatically based on language text density [3].
Pricing is simple. Instead of competitor per-hour billing models (like FireCut charging per export hour), KreateFlo gives you a free tier with 3 tools forever (Silence Remover, Transition Assistant, Copy & Paste).
When you need full AI automation, the Pro plan is $19.99/mo for 20 AI hours, and the Studio plan is $44.99/mo for 50 AI hours.
The catch? If you only edit one 30-second short video every month, paying for a plugin subscription isn't worth your money. Stick to Premiere's free native Track Styles workaround described in the previous section.
But if you ship 5 to 30 hours of long-form interviews, podcasts, or client shorts a week, CaptionFlow cuts your workflow from 4 hours down to 90 seconds.
If you also edit multi-camera podcasts, check out our guide on how to automate your Premiere Pro multi-cam editing workflow or read our deep-dive comparison on FireCut vs AutoPod.
Actionable Takeaway: Use dedicated NLE plugins like CaptionFlow when scaling high-volume vertical output to bypass render loops and automate line-break styling.
How to Adjust Caption Line Spacing for Vertical Videos in CapCut
If you cut fast social content on desktop or mobile apps like CapCut, line spacing adjustments are built directly into the main interface [8].
Navigating the CapCut Text Style Panel
Unlike native Premiere Pro open captions, CapCut includes dedicated sliders for spacing [8]:
Import your 9:16 vertical video clip [8].
Click Text in the top navigation bar and select Auto Captions [8].
Once generated, select a caption box on your timeline.
Open the right-hand panel and switch to the Text > Basic tab [8].
Adjusting Line Spacing and Tracking Sliders
Scroll down in the Basic panel to locate the Spacing section [8].
Here you will find two primary sliders:
Line Spacing: Controls vertical leading between line one and line two [8].
Letter Spacing (Tracking): Controls horizontal space between characters [8].
Slide the Line Spacing control until your multi-line subtitles maintain visible separation [8].
CapCut defaults to multi-line auto-caption output, so check your transcript to ensure it hasn't generated 3-line text blocks [4][6]. If it has, split the text block manually into two separate one-line captions [4].
Pro Tip: In CapCut, pair white text with an 80% opacity black background box [3] or a 4px black stroke [3]. This preserves line contrast even when background footage shifts from dark to light.
Actionable Takeaway: In CapCut, use the dedicated Line Spacing slider under Text > Basic to prevent auto-caption lines from crowding.
Fixing Safe Zone Overlaps on TikTok, Reels, and YouTube Shorts

Adjusting line spacing won't matter if your captions are buried under platform UI buttons.
| 40|Visuals | NaN |
|---|
Understanding Platform UI Overlays
Each mobile platform overlays proprietary buttons directly onto your video:
TikTok: Right-side action icons (like, comment, bookmark, share), bottom user handle, sound title, and expanded caption description text [4].
Instagram Reels: Right-side engagement icons, bottom audio ticker, and client profile name [4].
YouTube Shorts: Right-side like/dislike buttons, bottom channel subscribe banner, and title description [4].
If you place your captions at the absolute bottom of the 1080x1920 frame, platform descriptions will cover your text entirely [4].
+-----------------------------------+
|            TOP MARGIN             | 5% Safe Area Buffer [4]
|                                   |
|                                   |
|        [ OPTIMAL CAPTION ]        | Middle-Center Position [4]
|        [   SAFE ZONE     ]        | (Avoids chin & UI overlays)
|                                   |
|                                   |
| X X X X X X X X X X X X X X X X X | UI Overlay Danger Zone! [4]
| X [Likes] [Comments] [Profile]  X | (TikTok/Reels UI covers text)
+-----------------------------------+
Applying the 5% Margin Safe Area Boundary
To ensure complete visibility across all platforms, apply a strict 5% safe title area margin [4] around all borders of your 9:16 sequence.
Position your subtitle blocks in the center-middle third of the vertical frame [4]. Place your text roughly two lines above the bottom UI area [4] and clear of the speaker's mouth.
This guarantees your custom line spacing remains readable no matter which app your viewer uses.
Actionable Takeaway: Position 9:16 captions in the middle-third vertical safe zone, keeping text clear of the bottom 25% app UI overlay zone.
4 Mobile Typography Mistakes That Destroy Engagement
Avoid these common visual errors when styling captions for short-form clips:
1. Using Widescreen Spacing Ratios on 9:16 Frames
Defaulting to horizontal 16:9 subtitling guidelines produces text lines with 32 to 42 characters [4][2]. On vertical screens, this forces text to shrink, creating cramped multi-line text walls that clutter portrait framing [4][6].
2. Ignoring Letter Descender Collisions
Setting leading too tight causes letter descenders ("p", "g", "y") to touch ascenders ("h", "t", "b") directly beneath them [10]. This creates visual clutter that distracts from your video content.
3. Relying on Raw SRT Files Instead of Burned-In Captions
Sidecar SRT files contain plain text and timecodes—they do not store font styles, leading values, or background boxes [7][4].
If you upload an SRT to TikTok, the app strips your formatting and renders plain default text [4]. Burning open captions directly into your export guarantees 100% control over font choice, leading, and positioning [4][3].
4. Splitting Phrases Across 3+ Lines
Allowing auto-captioning tools to output 3 or 4 line text blocks overwhelms handheld screens [4][6]. Always stick to 1 or 2 lines maximum per caption block [4][3][6].
Actionable Takeaway: Export hard-coded open captions with strict 2-line caps instead of raw SRT sidecars to preserve typography across platforms.
Manual vs. Plugin-Based Caption Workflows
Here is how standard NLE caption workflows compare across speed, control, and precision:
Feature / Metric | Native Premiere Pro Captions | CapCut Desktop / Mobile | KreateFlo CaptionFlow Plugin |
|---|---|---|---|
Leading Slider Support | No (Requires Graphic Upgrade) [7] | Yes (Native Slider) [8] | Yes (Live WASM Engine) |
Setup Time per Short | 15–25 Minutes | 5–10 Minutes | 60–90 Seconds |
Character Limit Control | Manual Split / Basic Preset [1] | Manual Adjustment [8] | Automated (15–28 chars) [4] |
Real-Time Preview | Requires Timeline Rendering | Native App Preview [8] | WASM Real-Time (No Loop) |
Multi-Language Support | Supported [1] | Supported [8] | 40+ Languages |
Best Suited For | Occasional Widescreen Exports | Quick Mobile Edits | High-Volume NLE Editing |
Recommended Workflow
Perfecting caption line spacing on vertical videos isn't just about pretty typography. It directly protects your retention curve and watch time metrics [5].
While native tools in Adobe Premiere Pro require extra steps to convert captions into graphic layers [1], plugins like KreateFlo automate the entire styling pipeline in seconds.
Ready to stop wasting hours on repetitive NLE tasks? Head over to our download page to try CaptionFlow and streamline your vertical video workflow today.
Frequently Asked Questions
How do I adjust caption line spacing in Adobe Premiere Pro?
To adjust caption line spacing in Premiere Pro, select your subtitle clips on the timeline and navigate to Graphics and Titles > Upgrade Caption to Graphic [1]. Open the Essential Graphics or Properties panel and adjust the Set the Leading numerical slider under Text Properties [1].
What is the recommended font size and character limit for vertical video captions?
For 9:16 vertical video (1080x1920), keep line lengths between 24 and 28 characters [4] with a maximum of 2 lines per caption block [4][3]. For burned-in captions, use a bold sans-serif font sized around 40px to 70pt [4][3] depending on your design style.
How do I keep subtitles from overlapping TikTok and Instagram Reels UI buttons?
Position captions in the middle-third of your vertical frame and enforce a 5% safe title area margin [4] from all screen borders. Keep text roughly two lines above the bottom screen boundary [4] to clear TikTok and Reels action buttons, user handles, and descriptions.
Can you change subtitle leading in CapCut for vertical 9:16 videos?
Yes, CapCut includes dedicated sliders for Line Spacing and Letter Spacing (tracking) in the Text > Basic editing panel across desktop, mobile, and web versions [8].
What is the difference between open burned-in captions and sidecar SRT files for short-form clips?
Burned-in open captions render text directly into the video pixels, guaranteeing your custom line spacing, font choices, and animations remain identical across all mobile devices [4][3]. Sidecar SRT files contain raw text and timecode only, leaving line spacing and styling to the platform's default player settings [7][4].
References
graduateschool.edu/learn/premiere-pro/video-captioning-premiere-pro authority
usu.edu/accessibility/policy/standards/caption-quality-standards authority
closedcaptioncreator.com/blog/articles/captioning-for-9x16-video.html
nimdzi.com/subtitling-vertical-videos-guidelines-where-art-thou/
community.adobe.com/questions-729/change-the-line-spacing-in-open-caption-1427181
capcut.com/resource/adjust-text-spacing-and-layout-in-videos
capcut.com/ideas/ai-design/ai-infographic-for-freelance-social-media-creators
community.adobe.com/questions-729/captions-background-alignment-1335738
teleprompter.com/blog/vertical-video-strategy-for-social-media
Try KreateFlo free
3 tools forever, 7-day trial on the rest. No credit card to start.
Download KreateFlo