MrBeast Captions Premiere Pro: Ultimate 5-Step Guide
Most editors spend three hours manually keyframing bouncy, word-by-word captions in Adobe Premiere Pro because they think it is the only way to hold retention. They are wrong. Stacking scale keyframes
Most editors spend three hours manually keyframing bouncy, word-by-word captions in Adobe Premiere Pro because they think it is the only way to hold retention. They are wrong. Stacking scale keyframes across hundreds of Essential Graphics clips isn't showing attention to detail. It is destroying your hourly rate.
When I started editing podcast clips and short-form video content for YouTube Shorts and TikTok, captions felt like an afterthought. Then top agency creators redefined short-form visual pacing. Suddenly, standard multi-line subtitles felt slow, static, and outdated. Viewers stopped reading and started scrolling past. To keep eyes glued to the screen, we had to make text pop on every single spoken syllable.
Building high-retention text animation natively inside Adobe Premiere Pro is completely doable. But the default captioning setup hides the exact settings you need behind buried preference menus and conversion steps. Here is the full native workflow to build MrBeast style captions inside Premiere Pro, how to keyframe text animations efficiently, and how to use automated tools when manual keyframing starts burning out your wrist.
Key Takeaways
- Standard subtitles inform viewers, but animated caption graphics drive visual rhythm and increase short-form retention.
- Premiere Pro requires setting maximum character length and minimum line duration to their lowest values to force a single-word transcription layout.
- Native subtitle tracks cannot be animated with keyframes until you execute the Graphics & Titles > Upgrade Caption to Graphic command.
- Applying heavy strokes or drop shadows directly inside Text Animator breaks per-word animation unless you nest the text layer first.
- Custom Transform effect scale pops (100% to 118% to 100%) can be saved as reusable Effect Presets to streamline future edits.
- Automated extensions like CaptionFlow reduce caption styling time from 3 hours down to 90 seconds using real-time WebAssembly (WASM) previews.
Why Static Subtitles Fail (And What MrBeast Captions Do Differently)
If you drop standard two-line subtitles onto a 60-second vertical video, viewer drop-off happens within four seconds. Why? Static text forces the human brain into passive reading mode.
Viewers read the block of text faster than the host speaks. They realize what is coming next, get bored, and scroll away.
MrBeast style captions flip this
+-------------------------------------------------------------------+
|                        SUBTITLE PACING                            |
|                                                                   |
| Static Subtitles:                                                 |
| [ The quick brown fox jumps over the lazy dog ]  --> Passive      |
|                                                                   |
| MrBeast Style Captions:                                           |
| [ The ] -> [ QUICK ] -> [ BROWN ] -> [ FOX! ]    --> Active       |
+-------------------------------------------------------------------+
Subtitles vs. Animated Caption Graphics
Standard subtitles exist primarily for accessibility. They sit quietly at the bottom of the frame in a neutral font so hard-of-hearing viewers can follow along.
Animated caption graphics operate as active visual effects. They live in the middle third of the screen, react to vocal emphasis, and change size, color, or scale on key verbs and adjectives short-form visual pacing analysis.
- Subtitles: Passive accessibility overlays designed for silent listening.
- Caption Graphics: High-retention graphic elements engineered to direct viewer focus.
The Science Behind Single-Word Pacing and Viewer Retention
Single-word captioning aligns visual pacing directly with spoken audio to boost viewer retention on fast-paced social feeds [1]. When a new word hits the screen every 200 to 400 milliseconds, the viewer's visual cortex receives continuous motion triggers.
To maintain legibility during rapid cuts, rely on heavy display fonts like Komika Axis, SF Pro Display (Black weight), or Montserrat ExtraBold [7]. These typefaces maintain clear visual structure even when shrinking down to smaller mobile screens.
100% single-word dynamic captions
Actionable Takeaway: Shift your mindset from writing passive accessibility text to editing active, rhythmic caption graphics that match your spoken audio cuts.
How to Build MrBeast Style Captions in Premiere Pro Using Native Tools
Premiere Pro has built-in speech-to-text tools, but its default caption preset outputs traditional multi-line subtitle blocks. You have to tweak the formatting sliders before generating your transcript to force single-word cuts.
Setting Up the Create Captions Dialog for One-Word Cuts
Start by opening your project in Adobe Premiere Pro and selecting your sequence. Go to the Text panel (Window > Text), navigate to the Transcript tab, and click Auto-transcribe sequence.
Once Premiere finishes processing the speech-to-text transcription, click the CC (Create Captions) icon at the top of the Text panel. This opens the Create Captions dialog box.
+-------------------------------------------------------------------+
|                    CREATE CAPTIONS SETTINGS                       |
|                                                                   |
| [x] Create from transcript                                        |
| Caption Preset: Default Subtitle                                  |
|                                                                   |
| Maximum length in characters : |==--------------| (7 - 10)         |
| Minimum duration in seconds  : |==--------------| (1.2s)          |
| Gap between captions (frames): |----------------| (0)             |
| Lines                        : [ Single ]                         |
+-------------------------------------------------------------------+
Adjusting Character Length and Line Duration Sliders
To generate word-by-word subtitle clips natively inside Premiere, you must adjust the character length and line duration settings to their lowest possible values [8], [10]:
- Expand the Caption Preferences drop-down menu inside the Create Captions window.
- Select Single Word layout if available in your current Premiere build [1].
- Set Maximum length in characters to its lowest slider value (between 7 and 10 characters) [8].
- Set Minimum duration in seconds to its minimum setting (1.2 seconds) [10].
- Change Lines from Double to Single.
Click Create Captions. Premiere Pro will generate a dedicated Subtitle track (typically labeled C1) directly above your video layers on the timeline.
Actionable Takeaway: Always drop character length and minimum line duration sliders to their absolute minimums before generating captions to avoid splitting clips manually later.
Upgrading Subtitles to Graphics for Keyframe Motion Control
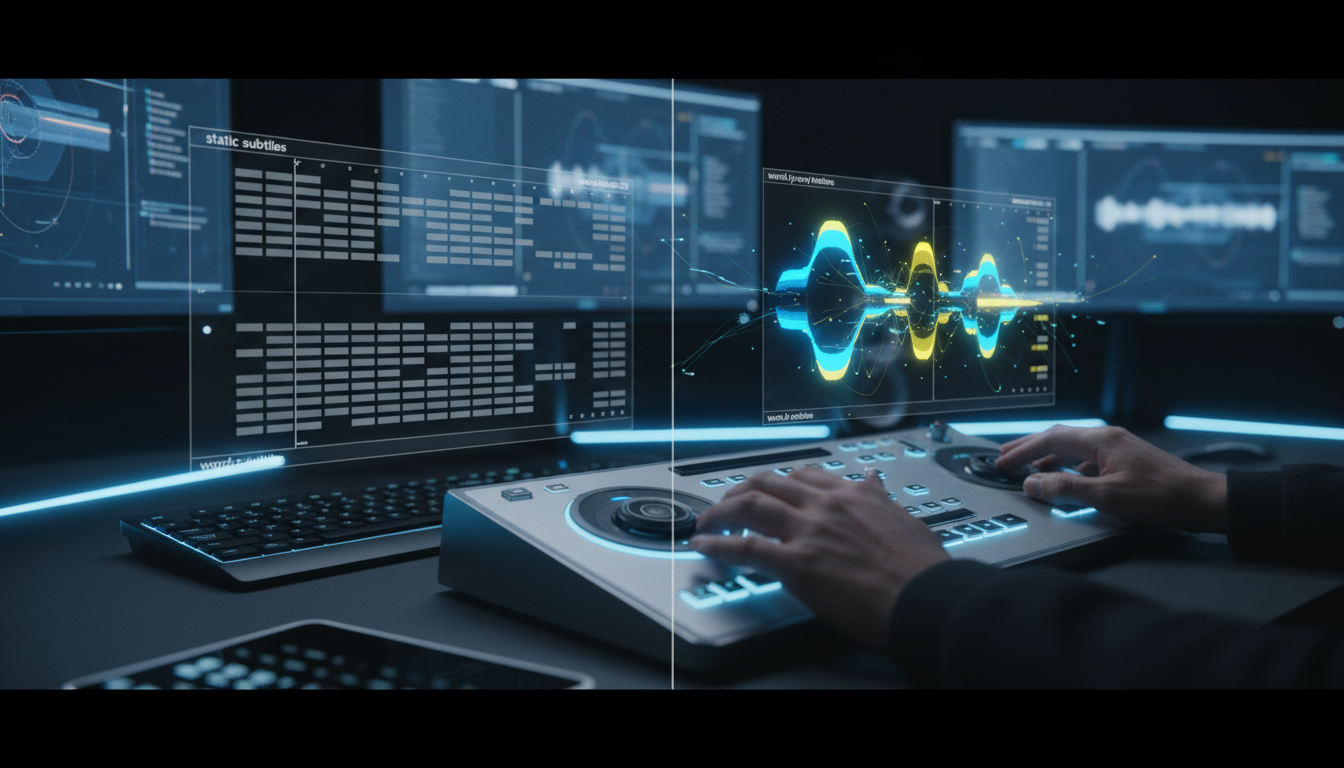
You now have single-word captions on your C1 subtitle track. But if you click on one of those caption clips and open the Effect Controls panel, you will hit a frustrating wall. Premiere locks out keyframes for Motion, Scale, and Position on subtitle tracks.
+-------------------------------------------------------------------+
|                  TIMELINE CONVERSION WORKFLOW                     |
|                                                                   |
| [ C1 Subtitle Track ]  --> Static Text Only (No Motion Keyframes) |
|          |                                                        |
|          v  (Graphics & Titles > Upgrade Caption to Graphic)       |
|          |                                                        |
| [ V2 Video Track ]     --> Essential Graphics (Full Keyframes)    |
+-------------------------------------------------------------------+
Why Regular Caption Tracks Block Animation Keyframes
Standard subtitle tracks in Premiere Pro are designed strictly for closed-caption broadcast standards [3]. Because broadcast captions must comply with static position grids, Premiere disables motion keyframing on default C1 caption tracks [5].
Here's the catch: if you want scale pops, smooth ease-in bounces, or rotoscoped layer depth, you must convert those subtitle blocks into graphic clips on a video track [2].
Executing the Upgrade Caption to Graphic Command
Upgrading static captions into graphic layers requires just two clicks:
- Select all generated caption clips on your C1 timeline track using the Selection Tool (
V). - Navigate to the top menu bar and click Graphics & Titles > Upgrade Caption to Graphic [2], [3].
Premiere Pro will process the selection and convert your subtitle track into editable Essential Graphics text clips placed directly onto a standard video track (such as V2 or V3) [1], [4].
100% when upgraded to graphics
Pro Tip: Once converted to graphic clips, your captions inherit all standard video clip properties. You can slice them, apply video transition effects, adjust blend modes, or stack video layers above and below them for custom foreground masking.
Actionable Takeaway: Run Upgrade Caption to Graphic immediately after transcribing so you can edit text keyframes in Effect Controls.
Building Custom Text Animator Effects and Scale Pops in Premiere
Now that your captions are standard graphic clips on a video track, you can apply custom keyframe motion. The classic MrBeast caption style relies on a punchy 4-frame scale pop whenever a word hits the screen.
+-------------------------------------------------------------------+
|                     SCALE POP KEYFRAME GRAPH                      |
|                                                                   |
| Scale (%)                                                         |
|   120% |               * (Frame 3: 118%)                          |
|   110% |              / \                                         |
|   100% | *-----------*   *------------------*                     |
|          (Frame 1) (Frame 2)              (Frame 6)               |
|          100%      100%                   100%                    |
|                                                                   |
| Timeline: |----|----|----|----|----|----|                         |
| Frames:   1    2    3    4    5    6                            |
+-------------------------------------------------------------------+
Applying Transform Effects and Setting Ease In Keyframes
Instead of keyframing the graphic clip's native Motion controls, use the Transform video effect. Native motion scaling can cause text rasterization blur, whereas the Transform effect keeps vector text crisp.
- Open the Effects panel (Window > Effects) and search for Transform.
- Drag and drop the Transform effect onto your upgraded text graphic clip.
- Open Effect Controls and navigate to the Transform effect settings.
- Move your timeline playhead to the very first frame of the caption clip.
- Set a keyframe on Scale at 100%.
- Advance the playhead forward 2 frames and set a second keyframe at 118%.
- Advance the playhead forward another 2 frames and set a third keyframe back at 100%.
- Right-click the middle keyframe (118%), hover over Keyframe Interpolation, and select Continuous Bezier or Ease In.
- Uncheck Use Composition's Shutter Angle and set Shutter Angle to 180 to add organic motion blur to the scale pop.
To reuse this animation without rebuilding it from scratch, right-click the Transform heading in your Effect Controls panel and click Save Preset [9]. Name it "MrBeast Scale Pop" so you can batch-apply it to future clips.
Using Premiere Pro Version 25.5 Per-Word Text Animators
If you run Adobe Premiere Pro version 25.5 or later, Adobe added a built-in Text Animator engine inside the Essential Graphics panel [6]. This allows you to apply word-by-word scale and opacity reveals across multi-word text blocks without splitting clips manually.
In Essential Graphics, select your text layer, enable Text Animator, and change the Animate object type setting from Character to Word [6].
Nesting Layers to Fix Broken Strokes and Drop Shadows
A common glitch occurs when applying Text Animator effects to text layers with heavy outlines or drop shadows. The stroke outline often gets distorted during the scale transition [6].
+-------------------------------------------------------------------+
|                   NESTING FIX FOR TEXT STROKES                    |
|                                                                   |
| Broken:  Text Layer + Heavy Stroke + Text Animator --> Distortion  |
|                                                                   |
| Correct: [ Text Layer + Heavy Stroke ]  --> Right Click > Nest    |
|          [ Nested Sequence ] + Transform Effect --> Clean Render  |
+-------------------------------------------------------------------+
The fix is simple. Set up your font, fill color, stroke weight, and shadow in Essential Graphics first. Then, right-click the graphic clip on your timeline and choose Nest. Apply your scale pop Transform effect or preset directly to the Nested Sequence rather than the raw text element [6].
Actionable Takeaway: Save your keyframed Transform effect as an Effect Preset, and nest graphic clips before adding heavy stroke outlines to keep vector renders clean.
How to Build MrBeast Style Captions in Premiere Pro Fast with CaptionFlow
Manual keyframing gives you granular control, but manually managing hundreds of individual text clips across a 30-minute podcast or a batch of 15 short-form clips destroys your output volume. Setting keyframes clip by clip takes up to 3 hours for a single 60-second video [5].
That is why we built CaptionFlow inside KreateFlo. KreateFlo is an Adobe Premiere Pro extension (CEP plugin) that bundles 33+ editing tools directly inside your native Premiere workspace.
+-------------------------------------------------------------------+
|               MANUAL KEYFRAMING VS. KREATEFLO CAPTIONFLOW         |
|                                                                   |
| Manual Workflow:                                                  |
| Transcribe -> Set Sliders -> Convert -> Nest -> Keyframe -> Tweak |
| Time: ~3 Hours per 60-second video                                |
|                                                                   |
| CaptionFlow Workflow:                                             |
| Select Track -> Pick Animated Preset -> Click Apply               |
| Time: ~90 Seconds per 60-second video                             |
+-------------------------------------------------------------------+
Automating Word-by-Word Animation Without Keyframes
With CaptionFlow, you skip manual clip slicing, subtitle conversion menus, and repetitive keyframing:
- Open the KreateFlo panel inside Premiere Pro (Window > Extensions > KreateFlo).
- Select your audio track or existing transcript.
- Choose from 22 built-in animated caption presets, including MrBeast Bouncy, Alex Hormozi Highlight, Clean Pop, and Neon Glow.
- Click Generate. CaptionFlow automatically creates styled, word-by-word animated text graphics directly on your sequence.
Because KreateFlo runs natively inside Premiere Pro v1.0.3, your text remains 100% editable on your timeline. If a host mispronounces a word, double-click the text on screen and fix it instantly.
Real-Time WASM Previews vs. Render Loops
When editing MOGRT templates or heavy After Effects text animations, Premiere often forces you to wait for red render bars before checking animation timing.
CaptionFlow uses a custom WebAssembly (WASM) real-time preview engine. You can change font styles, stroke weights, active word highlight colors, and scale pop intensity, and see the updated animation playback instantly without hitting render.
| Before | 3 Hours |
|---|---|
| After | 90 Seconds |
When KreateFlo Isn't the Right Choice for Your Edit
I believe in picking the right tool for the job. KreateFlo is not a magic wand, and it isn't right for every timeline.
- Don't use KreateFlo if you only edit one 30-second video per month. Native Premiere Pro tools handle light work just fine.
- Don't use KreateFlo if you require complex 3D particle systems or kinetic typography built in After Effects. Deep 3D motion graphics still require custom AE comps or MOGRT files.
- Use KreateFlo if you are an agency editor, podcast producer, or creator turning long-form cuts into dozens of short clips every week and need to save hours per project.
KreateFlo includes a Free tier with 3 tools forever (Silence Remover, Transition Assistant, and Copy & Paste). Paid tiers start at $19.99/mo for Pro (includes 20 AI processing hours) and $44.99/mo for Studio (50 AI hours).
Actionable Takeaway: Use native Premiere features for occasional edits, but switch to CaptionFlow when managing high-volume client projects.
Common Word-by-Word Caption Mistakes That Ruin Your Edit Pacing

I inspect a lot of junior editor cuts, and most caption errors come down to over-styling. When every element screams for attention, nothing stands out.
+-------------------------------------------------------------------+
|                     CAPTION HIGHLIGHT STRATEGY                    |
|                                                                   |
| Poor Pacing (Over-styled):                                        |
| [ THIS ] [ VERY ] [ AMAZING ] [ SECRET ] [ WILL ] [ BLOW ]        |
| (All words highlighted in yellow -- visual fatigue)               |
|                                                                   |
| Good Pacing (Selective Focus):                                    |
|   This   very   [ AMAZING ]  secret   will  [ BLOW ]              |
| (Only key focal words highlighted -- clear visual hierarchy)      |
+-------------------------------------------------------------------+
Highlighting Every Word Instead of Key Words
Highlighting every single word in bright yellow or neon green creates visual fatigue [11]. Viewers stop processing word emphasis when the entire paragraph flashes bright colors.
Keep your base text color white or off-white. Reserve bright accent highlights (like yellow, green, or cyan) strictly for one or two high-impact focal words per sentence.
Overusing Loud Colors and Blinding Outlines
Adding a 20-pixel black stroke alongside a heavy drop shadow and a red background box turns captions into unreadable visual clutter.
Maintain
Ignoring Font Weight and Display Legibility
Light, thin, or condensed script fonts disintegrate when viewed on small mobile screens. Always stick to heavy, bold display typefaces.
| Font Name | Style / Weight | Best Used For |
|---|---|---|
| Komika Axis | Bold / Heavy | Classic MrBeast bouncy short-form clips |
| SF Pro Display | Black / Heavy | Modern, clean tech and business interviews |
| Montserrat | ExtraBold | Punchy podcast highlights and commentary |
| Futura | Bold / Extra Bold | High-energy vlog and story content |
Pro Tip: Test your caption legibility by resizing your Premiere Pro Program Monitor down to 25% scale. If you cannot comfortably read the text at a glance, your font weight is too thin or your outline contrast is too weak.
Actionable Takeaway: Use white as your base font color, limit accent highlights to key verbs, and stick to heavy display fonts.
How to Build MrBeast Style Captions in Premiere Pro: Workflow Comparison
To evaluate your workflow options, let's break down how native Premiere keyframing compares to dedicated AI plugins on editing speed, cost, and feature flexibility.
| Feature / Metric | Native Premiere Pro Workflow | FireCut Extension | KreateFlo (CaptionFlow) |
|---|---|---|---|
| Setup Time (60s Short) | ~3 Hours | ~2 Minutes | ~90 Seconds |
| Workflow Location | Native Timeline | Premiere CEP Plugin | Premiere CEP Plugin (v1.0.3) |
| Animated Presets | Manual Keyframing / Custom Presets | Preset Library | 22 Animated WASM Presets |
| Pricing Structure | Included with Adobe CC | Per-hour usage billing | $19.99/mo Pro (20 AI hrs) / $44.99/mo Studio (50 AI hrs) |
| Free Tier Available | Yes (Native) | Trial only | 3 Tools Free Forever |
| Extra Suite Tools | N/A | Captioning / Cuts | 33+ Tools (Multi-Cam, Silence Remover, Reframing) |
| Before | $19.99/mo |
|---|---|
| After | Per-Hour Billing |
Manual Native Keyframing vs. AI Plugins
Manual keyframing in Premiere gives you total control over keyframe curves. But manually setting up Transform keyframes across 150 individual word clips per Short eats up hours of billable time [5].
Integrated AI extensions automate transcription, clip chopping, text styling, and bounce keyframing in a single pass. This frees you up to focus on storytelling, color grading, and audio polishing.
Pricing and Efficiency Breakdown
When evaluating plugin costs, watch out for hidden usage billing. Competitors like FireCut rely on per-hour credit billing, which quickly adds up if you edit hours of raw interview footage each week.
KreateFlo uses a flat subscription model:
- Free Tier: 3 tools free forever (Silence Remover, Transition Assistant, Copy & Paste).
- Pro Plan ($19.99/mo): Unlocks 20 AI hours per month across all 33+ tools, including CaptionFlow, Multi-Cam Editor (up to 8 speakers/cameras), and auto-reframing.
- Studio Plan ($44.99/mo): Unlocks 50 AI hours per month for heavy agency production workflows.
If you produce multi-speaker podcasts, KreateFlo's AI transcription also supports over 40+ languages, including English, Spanish, French, German, Bangla, and Hindi.
Actionable Takeaway: If you edit more than three short-form videos per week, switching from manual keyframing to an integrated extension like KreateFlo pays for itself on your very first client edit.
Frequently Asked Questions
How do you convert captions to graphics in Premiere Pro?
Select the caption clips on your sequence timeline, go to the top menu bar, select Graphics & Titles, and click Upgrade Caption to Graphic [2], [3]. This converts static subtitle tracks into fully editable Essential Graphics clips [1], [4].
What font is used for MrBeast style subtitles?
MrBeast and top short-form editors frequently use heavy, bold display fonts such as Komika Axis, SF Pro Display (Black weight), Futura Bold, or Montserrat ExtraBold for maximum legibility on mobile devices [7].
How do you create word-by-word captions in Premiere Pro?
Open the Text panel, transcribe your sequence, and click Create Captions. In the formatting settings, set the Maximum length in characters (7-10) and Minimum duration in seconds (1.2s) sliders to their lowest values to force single-word caption cuts [8], [10].
Why can't you animate regular captions in Premiere Pro?
Standard subtitle tracks are designed strictly for accessible open/closed subtitles, so Premiere locks their Motion and Effect Controls properties [3], [5]. You must upgrade them to Essential Graphics clips to enable position and scale keyframing [2].
What is the difference between subtitles and caption graphics?
Subtitles are static text elements meant for accessibility and reading comprehension. Caption graphics are animated text elements that use scale pops, highlight colors, and dynamic motion to match audio pacing and boost viewer retention [11].
Stop Keyframing Captions Word by Word
Building high-retention, MrBeast style captions doesn't have to consume half your editing day. Whether you manually convert subtitle tracks to graphics using native Transform presets or streamline your entire post-production pipeline using automated extensions, matching visual text movement to spoken dialogue is essential for short-form success.
Ready to cut your captioning workflow from hours down to 90 seconds while gaining access to 33+ professional editing tools inside Adobe Premiere Pro? Download KreateFlo for Premiere Pro and start using our free editing tools today.
References
- junoschool.org/article/premiere-pro-upgrade-caption-to-graphic/
- blog.nobledesktop.com/learn/premiere-pro/transforming-captions-to-graphics-for-enhanced-visibility-in-adobe-premiere-pro
- community.adobe.com/announcements-732/discuss-upgrade-captions-to-graphics-313291
- premierecopilot.com/en/blog/dynamic-word-by-word-captions-premiere-pro-guide
- youtube.com/watch
- youtube.com/watch
- youtube.com/watch
- youtube.com/shorts/wowOSjazKic
- youtube.com/watch
- youtube.com/watch
- vexub.com/blog/captions-increase-video-engagement
- ai-media.tv/wp-content/uploads/AI_Media_Whitepaper_Engagement_and_Retention.pdf
- tvtechnology.com/insights/analysis/study-nearly-half-of-americans-always-or-often-watch-video-with-captions
- autocut.com/en/blogs/how-to-create-animated-captions-automatically-in-Premiere-Pro/
- youtube.com/watch
- youtube.com/watch
Try KreateFlo free
3 tools forever, 7-day trial on the rest. No credit card to start.
Download KreateFlo