Cut Short Viral Clips in Premiere Pro: 5 Proven Steps
Exporting raw podcast footage to browser-based clipping tools is a massive waste of your client's budget and your own time. I used to burn four hours an afternoon round-tripping MP4s through cloud app
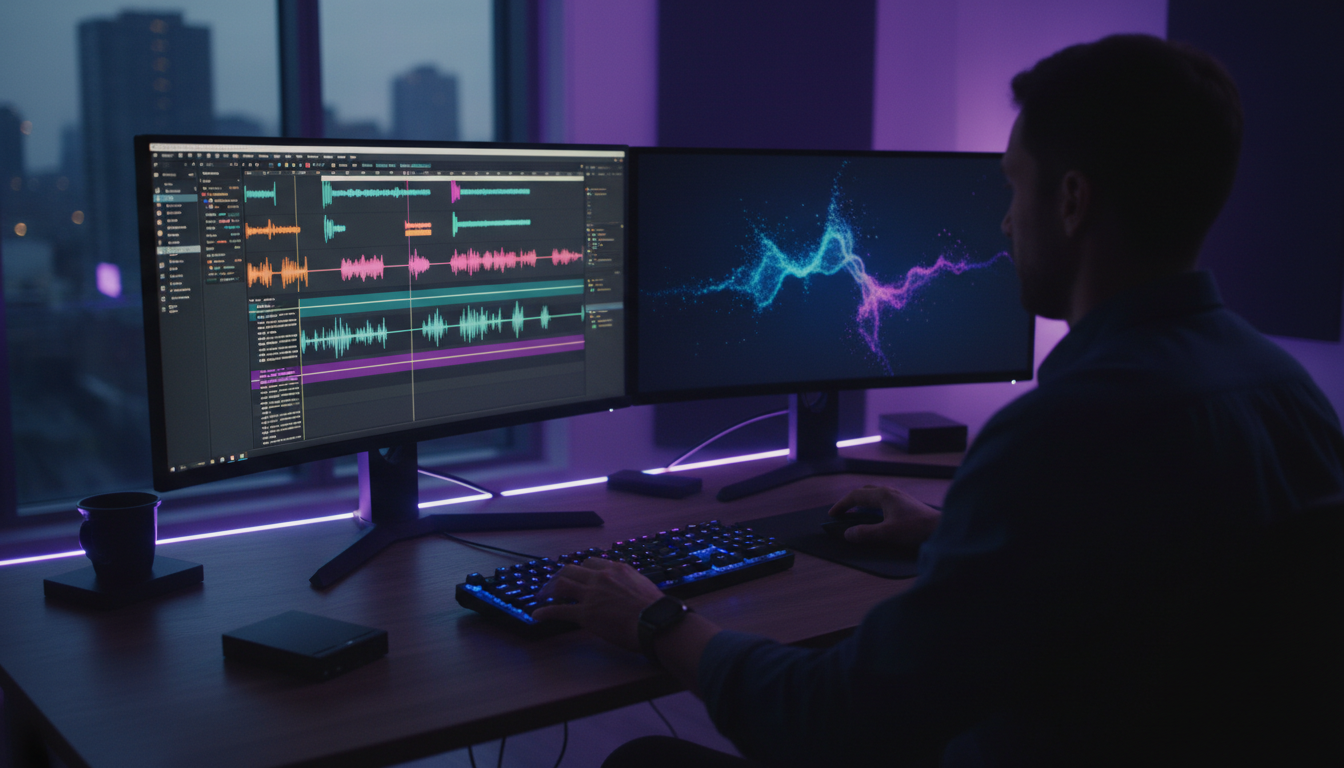
Exporting raw podcast footage to browser-based clipping tools is a massive waste of your client's budget and your own time. I used to burn four hours an afternoon round-tripping MP4s through cloud apps, only to end up with broken color grades and out-of-sync audio.
Learning how to cut short viral clips inside Premiere Pro dropped my post-production turnaround from four hours down to roughly 90 seconds per clip. And you don't need to overpay for clunky web subscriptions to do it.
Here is how you can streamline your short-form workflow inside Adobe Premiere Pro without sacrificing image quality or leaving your native timeline.
Key Takeaways
- Viewers decide whether to stay or swipe away within the first 7 seconds of a short video clip [2].
- Web-based editors break your color pipeline and force painful round-trip re-renders [5].
- Using an in-timeline extension like KreateFlo slashes editing time from 4 hours down to under 90 seconds per clip [4].
- Animated captions and strategic audio pop effects increase retention on TikTok and YouTube Shorts [2].
- Applying a QuickTime Gamma Fix LUT prevents washed-out color exports on iOS and mobile devices [2].
Why Manual Repurposing Is Dead and How to Cut Short Viral Clips Inside Premiere Pro
Manual markers across a two-hour multi-cam timeline will drain your soul. You watch footage at double speed, copy clips onto fresh vertical sequences, and tweak position keyframes by hand.
It's tedious work. And if you edit client podcasts for a living, that repetitive grunt work caps how many projects you can take on each week.
| Before | 4 Hours |
|---|---|
| After | 90 Seconds |
The Hidden Cost of Jumping Between Apps
Many editors turn to browser-based clipping tools to speed things up. But exporting master files to upload into third-party web apps creates massive bottlenecks [5].
You lose native access to raw camera files, uncompressed multi-track audio, and Lumetri color grades [5]. The result? Generational loss every time you pass media back and forth.
When you export a compressed MP4, re-encode it on a cloud server, and download the trimmed clip, your image quality takes a hit. Web-based engines crush shadow details, strip extended color data, and destroy sync across separate audio tracks [5].
Keeping High-Bitrate Master Quality Intact
Handling your entire short-form pipeline directly inside Adobe Premiere Pro protects your master media quality [4]. Staying inside your NLE means high-bitrate ProRes or RAW camera files stay untouched on your timeline [1]. You retain total control over your sequence parameters, audio routing, and visual motion graphics [2].
So how do you automate the heavy lifting?
You run an extension like KreateFlo v1.0.3 directly inside your Premiere Pro workspace. KreateFlo operates as a CEP (Common Extensibility Platform) panel, analyzing timeline audio and video metadata right where it lives. That keeps your raw media intact while eliminating cloud file transfers completely [4].
"Round-tripping files through browser apps ruined my color workflow. Keeping everything on the native Premiere timeline saved my sanity and cut my delivery times in half."
Actionable Takeaway: Stop exporting master timelines to web editors. Install an in-app CEP extension to execute short-form edits directly on your master Premiere Pro sequence.
The 7-Second Rule: Structuring Hooks That Force Viewers to Stop Scrolling
The first few seconds of a short reel decide its algorithmic reach. Audience analytics across TikTok, Instagram Reels, and YouTube Shorts prove that a viewer decides to stay or swipe away within the first 7 seconds [2].
If your clip opens with a slow verbal intro or a drawn-out breath, the viewer is already gone [2].
[[STAT:7 Seconds:Viewer retention hook window]]
Deconstructing Viral Hook Patterns
Viral hooks do not rely on clickbait. They rely on immediate narrative momentum [3].
Top creators structure clips by leading with the most surprising, emotional, or contrarian statement in the entire interview [3]. Place that peak statement in the first three seconds. Then backfill the setup context afterward [2].
Look for podcast statements that challenge common assumptions or deliver a strong statistical takeaway [3]. Starting a clip with a direct claim engages the viewer immediately and raises curiosity [3].
Trimming Dead Air and Filler Words Immediately
Even a great hook fails if it contains trailing dead air or hesitant filler words. Manually cutting out every "um," "ah," and two-second pause across a conversational interview takes hours of razor-tool trimming.
Instead of slicing gaps by hand, run the KreateFlo Silence Remover panel directly on your timeline. It detects silent gaps and filler audio based on customizable decibel thresholds, automatically ripple-deleting thousands of empty frames in seconds.
Trimming those micro-pauses creates the rapid-fire pacing that social algorithms reward [2].
Pro Tip: Set your silence removal buffer to roughly 100–150 milliseconds. This removes dead air while keeping the speaker's cadence natural rather than sounding artificial or robotic.
Actionable Takeaway: Place your strongest statement in the first 3 seconds of the video, then run automated silence removal to eliminate all pauses over 150 milliseconds.
Step-by-Step Workflow: How to Cut Short Viral Clips Inside Premiere Pro Fast

Building a streamlined editing pipeline requires optimized sequence templates and efficient keyboard shortcuts [2]. Here is how to construct a fast workflow for turning multi-hour horizontal recordings into high-converting vertical shorts [1].
+-------------------------------------------------------------------+
|               LONG-FORM PODCAST TIMELINE (16:9)                    |
+-------------------------------------------------------------------+
                                  |
                                  v
+-------------------------------------------------------------------+
|  1. AI Transcript & Clip Selection (KreateFlo Panel in Premiere)  |
+-------------------------------------------------------------------+
                                  |
                                  v
+-------------------------------------------------------------------+
|  2. Re-frame to Vertical Sequence (1080x1920 9:16 Preset)         |
+-------------------------------------------------------------------+
                                  |
                                  v
+-------------------------------------------------------------------+
|  3. Multi-Cam Auto-Framing & Dynamic Speaker Tracking            |
+-------------------------------------------------------------------+
                                  |
                                  v
+-------------------------------------------------------------------+
|  4. CaptionFlow Animated Captions + WASM Real-Time Preview        |
+-------------------------------------------------------------------+
                                  |
                                  v
+-------------------------------------------------------------------+
|  5. QuickTime Gamma Fix LUT & 1080x1920 MP4 Export                |
+-------------------------------------------------------------------+
Setting Up 9:16 Sequence Templates
Before editing, establish a standardized 1080x1920 sequence preset [1]. Managing aspect ratios manually across dozens of sequence tabs leads to inconsistent scaling [1].
- Open Premiere Pro and navigate to File > New > Sequence.
- Under the Settings tab, set the Editing Mode to Custom.
- Set the Frame Size to 1080 horizontal and 1920 vertical (a 9:16 aspect ratio) [1].
- Match your timeline timebase to your source footage (typically 23.976 fps or 29.97 fps).
- Choose Save Preset and name it
Vertical Short 1080x1920for quick one-click recall on future edits [1].
Using keyboard shortcuts like Ripple Trim Next Edit (W) and Ripple Trim Previous Edit (Q) alongside your sequence presets dramatically speeds up trimming [2]. Combining native Premiere shortcuts with pre-built MOGRTs lets you assemble clip layouts in minutes [2].
Finding Golden Moments in Long Podcasts
Scanning a two-hour audio track by ear to discover shareable clips is a major time drain [5]. Reading an automated transcript inside your editing workspace is far faster [5].
Instead of listening to the entire timeline, open KreateFlo inside Premiere Pro to run AI voice transcription across your sequence. KreateFlo supports over 40 languages—including Hindi and Bangla—and indexes your entire video recording into a searchable text transcript.
Highlight engaging segments in the text, then click one button to generate isolated candidate clips on your vertical timeline [5].
Actionable Takeaway: Save a permanent 1080x1920 sequence preset and use transcript-based text editing to locate candidate clips without re-watching long video files.
Auto-Framing and Multi-Speaker Layouts Without Leaving Your Timeline
Framing multi-speaker podcast recordings for vertical formats is frustrating [1]. A horizontal 16:9 shot featuring two or three speakers requires constant pan-and-scan keyframing to keep the active speaker visible [1].
Handling Up to 8 Speaker Multi-Cam Timelines
When editing multi-camera interviews, manual speaker switching takes significant effort. You cut between camera tracks, re-center subjects in the 9:16 frame, and verify that split-screen layouts don't crop out headroom [1].
+-------------------------------------------------------------------+
| Multi-Cam Speaker Switching Matrix (Up to 8 Speakers / Cameras)   |
+--------------------------+----------------------------------------+
| Speaker Track            | Automated Action                       |
+--------------------------+----------------------------------------+
| Audio Track 1 (Host)     | Centers Camera 1 in 9:16 Frame          |
| Audio Track 2 (Guest 1)  | Switches to Camera 2 on Vocal Trigger  |
| Audio Track 3 (Guest 2)  | Switches to Camera 3 on Vocal Trigger  |
| Dual-Speaker Dialogue    | Activates Stacked Split-Screen Layout  |
| Group Cross-Talk / Pause | Defaults to Wide-Shot Master Camera    |
+--------------------------+----------------------------------------+
The KreateFlo Multi-Cam Editor handles up to 8 distinct speakers and 8 camera angles simultaneously within Premiere Pro.
It analyzes individual audio tracks to identify who is speaking, then cuts between corresponding video channels in real time. It also features a dedicated wide-shot designation, switching to a wide master angle when multiple speakers talk at once or when pauses occur.
Dynamic Split-Screen vs Auto-Switching
For dynamic group conversations, auto-switching back and forth can feel jarring. In those cases, a stacked split-screen layout works better:
- Single Speaker Focus: Use auto-switching when one person delivers a long narrative or detailed answer.
- Stacked Split-Screen: Stack two 16:9 camera cuts vertically in a 9:16 frame during fast-paced back-and-forth debates.
- Wide-Shot Anchoring: Revert to the master wide shot during group laughter or simultaneous reactions to ground the visual space.
Pro Tip: Assign a 0.3-second switching delay in your plugin settings when configuring multi-speaker auto-framing. This prevents accidental camera cuts caused by minor background coughs or vocal interjections.
Actionable Takeaway: Use automated multi-cam tracking to handle speaker cuts, reserving split-screen layouts for fast-paced, multi-person dialogue.
Animated Subtitles and Sound Design: Retaining Audience Attention
Over 70 percent of social media users scroll through video feeds with sound turned off [2]. If your short-form clip lacks dynamic captions, most viewers will swipe past it immediately [2].
| 70|Visual Edits | NaN |
|---|
22 Kinetic Caption Presets with Real-Time Preview
Native Premiere Pro subtitles work fine for basic accessibility. But short-form platforms require stylized, word-by-word animated captions to hold viewer attention [2]. Creating these word-level animations manually in After Effects adds hours to your project [2].
The KreateFlo CaptionFlow tool provides 22 dynamic caption presets directly inside Premiere Pro.
Because it uses a WebAssembly (WASM) rendering engine, you get real-time caption previews without waiting for timeline renders. Adjust text colors, shadow layers, and font styles instantly on your live preview screen.
+-------------------------------------------------------------------+
| Kinetic Caption Styles Compared                                   |
+----------------------+--------------------+-----------------------+
| Preset Style         | Best Content Type  | Retention Impact      |
+----------------------+--------------------+-----------------------+
| Bouncing Pop Highlight | High-Energy Shorts | High visual focus     |
| Word-by-Word Karaoke | Educational Reels  | Strong reading sync   |
| Minimalist Lower Third | Professional Pods  | Clean, subtle look    |
| Impact Metallic Shake| Storytelling Clips | High emotional punch  |
+----------------------+--------------------+-----------------------+
Adding Impact SFX on Keyword Highlights
Visual captions work best when paired with subtle sound design [2]. Adding quick pop, swoosh, or camera shutter sound effects on key phrase reveals creates a rhythmic structure that keeps viewers hooked [2].
- Identify major transition points or takeaway words in your subtitle track.
- Place a short sound effect (such as a subtle bass drop or click) on an isolated audio track directly beneath the highlighted keyword.
- Lower the sound effect volume to roughly -12 dB to -18 dB relative to your main voice track so it complements the dialogue without overpowering it [2].
Actionable Takeaway: Apply animated, word-by-word captions using real-time plugin previews, and pair key highlighted phrases with subtle sound effects set to -15 dB.
Fixing QuickTime Gamma Shift Color Errors in Premiere Pro Exports

It is frustrating to spend hours grading footage in Premiere Pro, only to export a video that looks washed out on an iPhone [2]. This issue stems from the QuickTime Gamma shift [2].
Why Your Exported Clips Look Washed Out on Mobile
Premiere Pro manages color space using a Rec.709 gamma display spec of 2.4. However, macOS, iOS devices, and Safari rely on Apple's ColorSync utility, which decodes Rec.709 video using a 1.95 gamma curve [2].
+-------------------------------------------------------------------+
| QuickTime Gamma Shift Display Comparison                          |
+-------------------------------------------------------------------+
| Timeline Display (Gamma 2.4)   | Rich contrast, deep dark shadows |
+--------------------------------+----------------------------------+
| iOS / QuickTime (Gamma 1.95)   | Lifted blacks, washed-out tones  |
+--------------------------------+----------------------------------+
| Fixed Export (Gamma Comp LUT)  | Matches original timeline grade  |
+-------------------------------------------------------------------+
When you view an exported Rec.709 MP4 on an Apple device, ColorSync interprets the gamma incorrectly. It lifts your shadows and gives your footage a flat, faded look [2].
Applying the Correction LUT at Export
You can fix this color discrepancy directly in the Premiere Pro export window [2]:
- Open the Export tab in Premiere Pro (Cmd+M or Ctrl+M).
- Expand the Effects tab in the right-hand export settings panel.
- Check the Apply LUT box.
- Select the standard QuickTime Gamma Compensation LUT from your dropdown menu [2].
- Render your final 1080x1920 MP4 video clip.
This compensation adjustment applies a subtle contrast curve during export, offsetting the ColorSync shift so your final video matches what you saw on your editing monitor [2].
"Fixing the gamma shift on export solved our team's biggest client complaint. Our mobile colors finally match what we grade on screen."
Actionable Takeaway: Apply a QuickTime Gamma Compensation LUT in your export settings panel to ensure mobile exports maintain contrast and color saturation.
KreateFlo vs External Web Editors: When to Use an In-App Extension
Choosing the right short-form editing stack comes down to balancing speed, cost, and creative control. While browser-based tools offer quick cloud processing, dedicated NLE extensions provide professional-grade control directly on your native timeline [5].
+----------------------------------------------------------------------------------------+
| Tool Comparison: KreateFlo vs External Short-Form Editors                              |
+------------------+---------------------+-------------------+---------------------------+
| Feature          | KreateFlo (v1.0.3)  | FireCut           | Descript / Opus Clip      |
+------------------+---------------------+-------------------+---------------------------+
| Platform Type    | Premiere Pro Plugin | Premiere Plugin   | Standalone Web App        |
| Pricing Structure| $19.99/mo Flat Pro  | Per-Hour Billing  | $24–$29/mo Subscriptions  |
| Free Tier        | 3 Tools Free Forever| Limited Trial     | Watermarked Short Trial   |
| AI Time Allowance| 20 Hours (Pro Tier) | Variable Credits  | Tiered Credit Limits      |
| Multi-Cam Cap    | 8 Cam / 8 Speaker   | Basic Multi-Cam   | Automated Cloud Crop      |
| Subtitle Preview | Real-Time WASM      | Timeline Render   | Web Editor Only           |
| RAW File Access  | 100% Native Timeline| 100% Native       | Re-compressed Cloud Upload|
+------------------+---------------------+-------------------+---------------------------+
Comparing Flat Monthly Pricing vs Per-Hour Billing
External tools often use complex pricing models. Competitors like FireCut charge on a per-hour usage scale that can balloon quickly during busy production months. Cloud editors like Opus Clip or Descript charge monthly subscriptions that restrict raw file downloads and require re-rendering footage on web servers [5].
By comparison, KreateFlo offers predictable pricing built for editors:
- Free Tier: 3 core tools free forever (Silence Remover, Transition Assistant, and Copy & Paste).
- Pro Tier ($19.99/mo): Unlocks all 33+ tools alongside 20 hours of AI processing time per month.
- Studio Tier ($44.99/mo): Designed for high-volume content agencies, providing 50 AI processing hours per month.
When KreateFlo Is NOT the Right Pick for You
Let's be completely honest. KreateFlo is not the right tool for everyone.
If you don't use Adobe Premiere Pro as your primary editing software, KreateFlo won't work for you. It is built strictly as a CEP extension for Premiere Pro, not as a standalone desktop app or browser-based editor.
If you are a casual creator looking for a simple web interface to drag and drop a video file without touching professional editing software, a browser tool like Opus Clip is a better fit.
But if you are a professional editor, agency producer, or podcast creator who relies on Premiere Pro every day, keeping your workflow inside your NLE is the fastest way to work [5].
Actionable Takeaway: Choose an in-app extension like KreateFlo if you want to protect master image quality inside Premiere Pro, but opt for web tools if you don't use professional NLE software.
Streamlining Your Short-Form Editing Process

Chopping multi-hour podcast timelines into vertical clips doesn't have to consume your entire workday [5].
By staying inside Adobe Premiere Pro and utilizing dedicated CEP plugins like KreateFlo, you eliminate render-export loops, protect your color pipeline, and reduce your edit time from four hours down to 90 seconds per clip [4].
Ready to speed up your editing workflow? Download KreateFlo today and try the free tier forever on your next project.
Frequently Asked Questions
How do you fix QuickTime gamma shift color errors in Premiere Pro exports?
Apply the QuickTime Gamma Compensation LUT in the Export Settings panel under the Effects tab [2]. This offsets the contrast shift caused by macOS and iOS ColorSync rendering, ensuring your exported clip matches what you saw on your Premiere timeline [2].
How do top creators edit videos for high audience retention on TikTok and YouTube Shorts?
Top creators lead with strong 7-second hooks, cut out dead air, use animated word-by-word captions, and add subtle sound effects on key phrase reveals [2]. Automating these edits inside Premiere Pro preserves visual pacing while cutting turnaround times significantly [4].
What are the best shortcuts and presets to speed up short-form video editing in Premiere Pro?
Use Ripple Trim shortcuts (Q and W to trim head and tail cuts), create standard 1080x1920 vertical sequence presets, and use CEP panels like KreateFlo to handle auto-transcription, silence removal, and dynamic captions directly on your timeline [2].
How do you convert long-form podcast clips into vertical viral shorts using motion graphics?
Import your full timeline, use transcript-based AI tools to isolate key statements, move selections into a vertical 1080x1920 sequence, apply automated multi-cam framing, and overlay kinetic animated caption presets [1][5].
Is KreateFlo a standalone video editing application?
No. KreateFlo is a CEP plugin designed exclusively for Adobe Premiere Pro. It runs directly inside your Premiere Pro workspace so you never have to export intermediate master files or switch to third-party web apps [4].
References
- store.hollyland.com/blogs/creator-hub/edit-shorts-in-premiere-pro
- skillshare.com/en/classes/master-short-form-video-editing-premiere-pro-and-after-effects/980007187
- opus.pro/research/how-to-use-data-statistics-hooks
- community.adobe.com/feature-requests-730/let-ai-or-premiere-pro-create-shorts-from-long-videoclip-1328405
- phantomeditor.video/blog/how-to-clip-long-form-content-premiere-pro
- opus.pro/blog/short-form-video-trends-reshaping-creator-marketing-2026
- prodshort.com/blog/short-form-video-trends
Try KreateFlo free
3 tools forever, 7-day trial on the rest. No credit card to start.
Download KreateFlo