Animate Stream Captions: 5 Fast Steps for Twitch (2026)
Web clippers like Opus Clip are burning through your subscription budget every time you drop a 3-hour Twitch VOD into their browser queue. Spending 180 minutes of monthly plan credits on a single broa
Web clippers like Opus Clip are burning through your subscription budget every time you drop a 3-hour Twitch VOD into their browser queue. Spending 180 minutes of monthly plan credits on a single broadcast just to pull three 30-second clips is ridiculous. You can edit faster and animate word-by-word captions directly inside Adobe Premiere Pro without paying per-minute export penalties or waiting in browser render queues.
I edit long-form Twitch streams and podcasts every week. When you scrub VODs manually or round-trip through web tools, your hourly editing rate drops fast. So in this guide, I'm going to show you how Twitch streamers can animate stream highlight captions fast directly on your NLE timeline while preserving your budget and your sanity.
Key Takeaways
- Web clippers drain monthly minute credits rapidly on multi-hour Twitch VODs, making native NLE editing significantly cheaper.
- Mapping OBS Replay Buffer hotkeys or Stream Manager markers live eliminates up to two hours of manual VOD scrubbing per stream.
- Adobe Premiere Pro plugins generate native animated captions directly on your sequence timeline in under 90 seconds.
- Positioning text in the upper-middle safe area prevents TikTok, Instagram Reels, and YouTube Shorts UI buttons from covering critical words.
- Custom caption presets allow gaming channels to lock in signature typography and highlight colors across all short-form videos.
The Financial Trap of Browser-Based VOD Clippers
Browser clippers sell you on convenience. But their credit meters are rigged against long-form gaming creators.
Most third-party cloud tools charge you based on the total input VOD length, not the short clips you actually render. If you host a four-hour gaming session, feeding that raw file into a cloud clipper consumes 240 minutes of your monthly allowance immediately.
Scrubbing raw footage by hand can consume up to two full hours per broadcast stream [2]. But handing your VOD over to a web app creates a different headache. You trade editing labor for recurring credit expenses and upload bottlenecks.
Browser clippers charge you for input video length, not output clips. You're literally paying to render blank space, bathroom breaks, and chat pauses.
| Before | 2 Hours |
|---|---|
| After | 90 Seconds |
Why Per-Minute Credit Models Fail Gaming Editors
If you stream four days a week, you generate roughly 12 to 16 hours of raw video weekly. Cloud platforms charge heavy premiums for that volume.
A standard base tier for cloud clippers offers around 180 minutes of credit per month [3]. That means one single three-hour Twitch stream exhausts your monthly credit cap [3] before you even start editing your second stream of the week.
When your credits run out mid-week, you have to buy expensive add-on packs or upgrade to enterprise plans. That model works fine for 5-minute sales calls. It fails completely for Twitch streams.
The Hidden Cost of Full-VOD Cloud Rendering
Cloud processing sounds effortless until you factor in upload times. Pushing a 25 GB high-bitrate Twitch archive to a remote server takes time.
If your internet connection stutters, the upload fails mid-way and forces a complete restart. Once uploaded, you sit in a queue while cloud servers transcribe hours of background chatter.
Then comes the export back to your local drive. Sending footage back and forth across web browsers destroys your timeline momentum. You lose control over frame-accurate cuts, custom typography, audio keyframing, and multi-track spatial audio.
Actionable Takeaway: Stop uploading multi-hour raw archives to web clippers that bill by input minute; edit locally inside Adobe Premiere Pro to retain full footage control and eliminate credit caps.
How Twitch Streamers Can Animate Stream Highlight Captions Fast in Premiere Pro
To speed up your vertical highlight workflow, you need native execution inside your timeline. Adobe Premiere Pro remains the industry standard for short-form adaptation, but building frame-by-frame text animations manually in Essential Graphics takes hours.
Using dedicated timeline extensions like KreateFlo (currently v1.0.3), you can convert speech into animated captions instantly. Through our native CEP extension, tools like /features/captionflow.html handle auto-transcription and word-by-word animation inside your sequence workspace in 90 seconds flat.
+-----------------------------------------------------------------+
|                      PREMIERE PRO TIMELINE                      |
|                                                                 |
| [V2] [ Graphic Caption Track: Dynamic Highlight Animation ]     |
| [V1] [ Vertical 9:16 Reframed Twitch Gameplay Clip      ]     |
| [A1] [ Cleaned Audio Track (Voice Transcription Input)  ]     |
+-----------------------------------------------------------------+
Generating Word-by-Word Karaoke Text in Seconds
Modern audience attention spans on vertical video feeds drop down to 1.7 to 6 seconds long [1]. Standard static captions fail to hold viewer focus because text blocks sit frozen across the screen.
To stop scrolling thumbs, you need active word-by-word highlight animations where individual words light up as the streamer speaks.
Using automated speech recognition within an Adobe Premiere Pro extension lets you transcribe stream clips directly off your sequence audio track. KreateFlo supports voice transcription across 40+ languages, enabling high accuracy even when heavy game sound effects rumble beneath the commentary.
Real-Time WASM Preview vs Render Loops
Historically, adding styled title effects meant constant rendering loops. You tweaked font tracking or stroke color, hit render, waited for the red line to turn green, and checked the result. If the timing was off by two frames, you repeated the entire cycle.
Here's the fix: modern CEP extensions utilize WebAssembly (WASM) technology to deliver real-time caption previews.
You can adjust font weight, letter spacing, word animation speeds, and pop-in scales on the fly. You see exact visual feedback instantaneously without waiting on background render bars.
Traditional Workflow: Edit Text -> Render Effects -> Preview -> Repeat (15-20 mins)
WASM Timeline Workflow: Live Edit -> Instant Visual Feedback (0 seconds render wait)
Applying Preset Text Animations Directly on the Timeline
You don't need to build motion keyframes from scratch for every single video clip. CaptionFlow includes 22 animated caption presets engineered specifically for 9:16 vertical video retention.
Whether you want bouncy word pops, smooth kinetic slides, or high-contrast karaoke highlighting, you pick a style preset and apply it across your entire cut in two clicks.
Pro Tip: Choose a bold sans-serif font family with a heavy weight (like Montserrat ExtraBold or The Bold Font) when applying word-by-word animations. Heavy font weights ensure high contrast against fast-paced gameplay backgrounds.
Actionable Takeaway: Replace static caption tracks with dynamic word-by-word highlight presets to hook viewers within their initial 3-second watch window.
Step-by-Step Pipeline: OBS Replay Buffer to Timeline
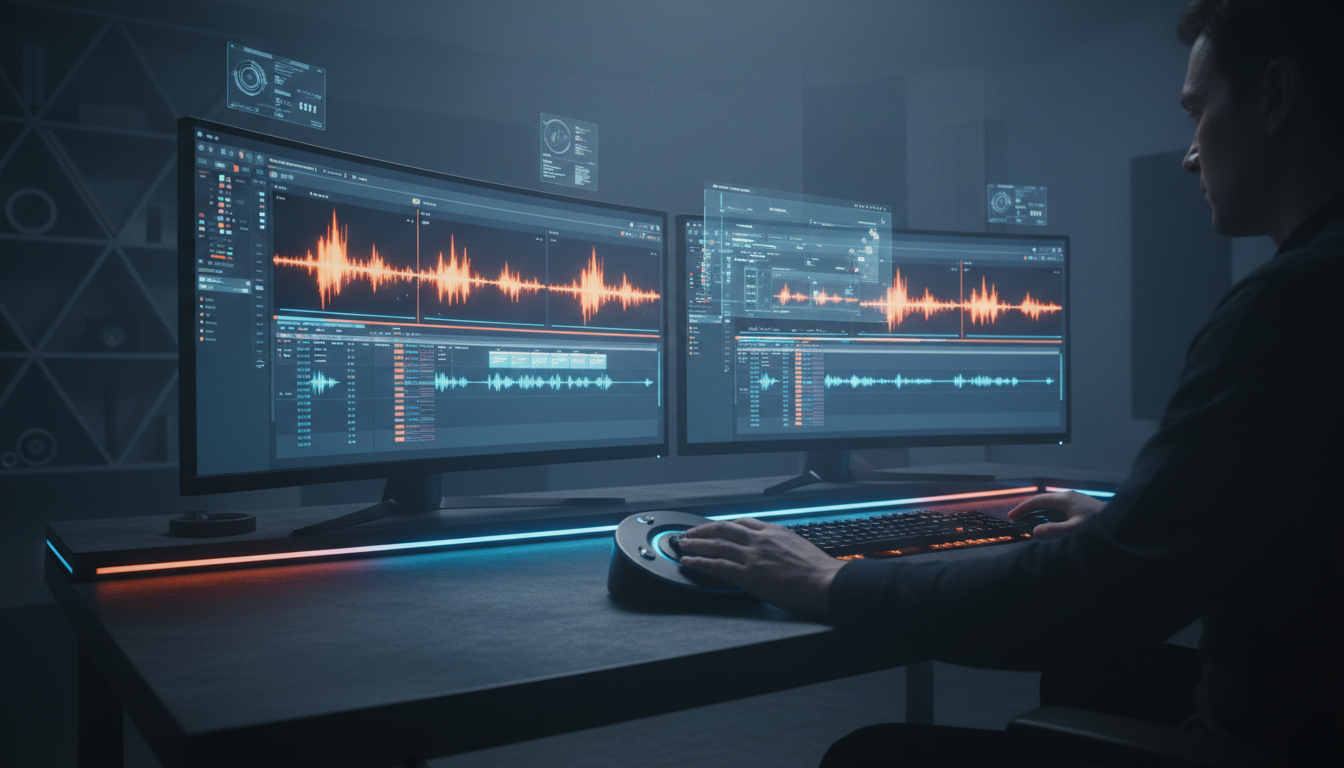
If you want to know how Twitch streamers can animate stream highlight captions fast, the secret starts during your stream, not after it ends. Waiting until your broadcast finishes to start scrubbing through 5 hours of footage is why so many editors burn out.
[ Live Twitch Stream ] ---> [ OBS Replay Buffer Hotkey ] ---> [ 60-Sec Highlight Clip ]
                                                                       |
                                                                       v
[ Premiere Pro Timeline ] <-- [ AI Auto-Transcription ] <-- [ Import Clip Folder ]
Setting Live Markers During Stream
Instead of rewatching entire VODs, log key moments while you are live. You can set up Stream Manager markers directly inside Twitch or configure an OBS Replay Buffer hotkey [2].
- Enable Replay Buffer in OBS Studio under Settings > Output.
- Set the buffer duration to 60 or 90 seconds (enough time to capture full commentary setup and reaction).
- Assign a dedicated hotkey on your Stream Deck or key rebound (e.g.,
Ctrl + F12). - Whenever a funny moment, clutch play, or loud argument happens live, press the hotkey. OBS writes that exact window to your local SSD as an isolated MP4 file.
Importing Clip Markers into Premiere Pro Sequences
When your stream ends, you don't have a bloated 50 GB VOD to scrub through. Instead, you have a dedicated folder containing 5 to 10 high-value highlight clips.
Drag those clips directly into your Adobe Premiere Pro project bin. Drop them onto a vertical 1080x1920 timeline sequence. Because you recorded short clips live, your timeline is already trimmed to high-energy moments. You just saved two hours of manual scrubbing before opening a single plugin panel.
Cleaning Gamer Terminology in AI Transcription
Before firing off your animated captions, spend 30 seconds scanning your generated transcript. Automated transcription engines handle conversational speech well, but specialized gamertags, game names, and Twitch emotes often trip up AI engines.
If you are playing VALORANT, the engine might transcribe "Jett" as "Jet" or "KAY/O" as "K.O." Using a plugin interface to execute a fast search-and-replace sweep ensures your automated captions maintain accurate gamer terminology [4] before exporting to social feeds.
[[STAT:90 seconds:timeline setup time using native plugins]]
Actionable Takeaway: Map an OBS Replay Buffer hotkey to capture live highlights automatically, saving 2+ hours of post-stream VOD scrubbing per edit.
How Twitch Streamers Can Animate Stream Highlight Captions Fast Without Credit Caps
Let's look closely at operational costs. Independent video editors, content agencies, and high-volume streamers can't afford unpredictable software expenses that scale up with every extra VOD hour.
| Feature / Metric | Browser Clipper (Opus Clip / StreamLadder) | Native Plugin (KreateFlo for Premiere Pro) |
|---|---|---|
| Billing Model | Per-minute input VOD credit caps [3] | Flat monthly subscription KreateFlo pricing structure |
| VOD Processing Limit | Restricted by monthly credit tier [3] | Unlimited local VOD length |
| Render Location | Remote web cloud servers | Local GPU/CPU hardware |
| Timeline Control | Restricted web editor canvas | Full Premiere Pro sequence timeline |
| Caption Flexibility | Web templates only | 22 native animated WASM presets |
| Free Access | Free trial with watermark / low limits | 3 tools free forever |
Comparing Flat Monthly Pricing to Credit Billing
Web tools sound affordable until you examine their credit tiers. Drop three 4-hour Twitch VODs into a browser tool, and you'll hit minute paywalls fast.
KreateFlo operates on predictable flat plans. Our free tier includes 3 tools forever (Silence Remover, Transition Assistant, and Copy & Paste).
When you need full AI automation, our Pro Plan costs $19.99/mo for 20 AI hours, while our Studio Plan costs $44.99/mo for 50 AI hours. Compare $19.99/mo to FireCut's per-hour billing or cloud credit meters, and the math speaks for itself. Because processing runs locally inside Adobe Premiere Pro, you are never penalized for handling massive video archives.
"If your editor charges per hour, buying tools that charge per minute is double dipping on your own expenses. Keep your processing local."
Unlimited Native Processing vs Web Queue Bottlenecks
When major creators stream massive events, cloud clipping servers experience heavy bandwidth congestion. Your clip queue stalls while waiting for server allocation.
By performing AI transcription and graphic generation natively inside your NLE, you bypass third-party cloud queues entirely. Your GPU handles the visual rendering, and your CPU executes text placement. Your workflow speed stays fast regardless of remote server loads or external network throttles.
Actionable Takeaway: Switch from per-minute browser subscriptions to flat-rate Premiere Pro extensions to keep your software expenses fixed while scaling your output.
Customizing Typography, Letter Tracking, and Platform Safe Zones
Creating fast captions is only half the battle. If your animated text gets hidden behind interface overlays on TikTok, Instagram Reels, or YouTube Shorts, your retention rates plummet.
+---------------------------------------------------+
|               VERTICAL 9:16 FRAME                 |
| [ TOP UI: Channel Handle & Search Bar ]           |
|                                                   |
|   +-------------------------------------------+   |
|   |         SAFE CAPTION ZONE                 |   |
|   |   (Upper-Middle Frame Positioning)        |   |
|   +-------------------------------------------+   |
|                                                   |
| [ RIGHT UI: Like, Comment, Share Icons ]          |
| [ BOTTOM UI: Audio Title & Caption Overlay ]      |
+---------------------------------------------------+
Avoiding TikTok and Reels Overlay Buttons
Every major vertical video platform overlays functional UI buttons on top of your video. TikTok places creator handles and descriptions at the bottom third, while engagement icons stack along the right margin.
To protect your readability, position animated captions in the upper-middle safe area [10] of the 9:16 canvas. Keep text centered horizontally, staying at least 200 pixels clear of the bottom margin and 150 pixels clear of the right edge.
Upgrading Caption Tracks to Graphic Title Layers
Standard sidecar subtitles (like SRT files or native Essential Sound caption tracks) lack keyframe flexibility. You can't add individual drop shadows, stroke outlines, or dynamic pop animations to standard subtitle lines.
Upgrading standard captions to graphic layers inside Adobe Premiere Pro unlocks full typographic styling, tracked font weights, and position keyframing [6]. This allows you to apply distinct character tracking, custom drop shadows, and multi-layered stroke borders that make white text readable over bright gameplay backgrounds.
Designing Signature Brand Highlight Colors
Visual consistency builds channel recognition. When viewers scroll past their feed, they should recognize your content style immediately.
- Primary Text: Crisp White (
#FFFFFF) or Bright Yellow (#FFE600) for high baseline readability. - Active Word Highlight: Electric Neon Green (
#00FF66) or Hot Cyan (#00E5FF) to guide eye tracking. - Background Stroke/Box: 100% Solid Black (
#000000) outline with 8 to 12-pixel padding to isolate text from moving game graphics.
Using custom caption style presets [9] keeps your typography, letter tracking, and color palettes locked across all client or channel projects.
| 60|Active Highlight Neon | NaN |
|---|
Pro Tip: Always apply a subtle drop shadow (Distance: 5, Size: 15, Opacity: 80%) beneath your animated caption layers. This keeps text legible even when gameplay effects like explosions or flashbangs white out the center frame.
Actionable Takeaway: Lock your caption placement inside the upper-middle 9:16 safe zone to ensure vertical platform UI elements never block your text.
When KreateFlo Is NOT the Right Pick for Your Channel
I believe in absolute honest tool recommendations. Trust matters more than hype, and KreateFlo is not built for every single creator setup.
When You Need Pure Browser-Based Mobile Editing
If you produce and publish your Twitch highlight clips entirely on an iPad, iPhone, or Chromebook without a desktop editing computer, KreateFlo is not the right pick for you.
KreateFlo is an Adobe Premiere Pro plugin (a dedicated CEP extension). It requires a desktop installation of Premiere Pro on Windows or macOS. If you prefer editing on mobile apps while riding the bus, browser-based clippers like StreamLadder [1] or Ssemble [2] will serve your mobile workflow better.
Non-Premiere Pro NLE Workflows
If your editing workflow relies exclusively on DaVinci Resolve, Final Cut Pro, or CapCut Desktop, KreateFlo cannot run inside your system. We build specifically for the Adobe ecosystem to maximize timeline integration for Premiere Pro power users.
Editors committed to other host NLEs will need to look at format-specific tools like Cutback Premiere Assistant [3] or specialized standalone utilities.
Need Desktop NLE Power + Timeline Precision?  ---> KreateFlo (Premiere Pro CEP)
Need Mobile-Only / Web Browser Editing?       ---> StreamLadder / Ssemble
Need Non-Adobe NLE Support (DaVinci/FCP)?     ---> Native NLE Subtitling Tools
Actionable Takeaway: Choose web clippers if you edit exclusively on mobile devices; choose native Premiere Pro plugins if you demand timeline precision, zero credit limits, and professional NLE control.
Batch Exporting Twitch Highlight Reels for Short-Form Growth
Scaling a Twitch audience requires consistency. Posting one short clip a week will not move the needle on modern platform algorithms. You need to ship 1 to 3 clips daily across TikTok, YouTube Shorts, and Instagram Reels.
Saving Custom Preset Style Templates
Once you tweak your typography, stroke padding, and animation speed, save that visual stack inside CaptionFlow as a custom channel preset. The next time you drop stream clips into your timeline, you apply your exact signature look with a single click. You eliminate repetitive styling setup entirely.
Automating Vertical 9:16 Auto-Reframing
Gaming streams are recorded in 16:9 widescreen, but short-form feeds require 9:16 vertical layouts. Manually keyframing your camera facecam to sit above gameplay takes valuable time.
Pairing animated captions with automated reframing tools keeps your webcam centered on top while tracking gameplay action in the lower window. You can learn more about structuring full long-form production systems in our /blog/podcast-editing-workflow.html breakdown.
Maintaining Daily Posting Schedules Across Platforms
Algorithm distribution rewards posting consistency. Organizing clip exports into batch sessions [8] allows you to produce a full week of short-form content in a single afternoon.
Here is the 4-step execution order:
- Cut 7 to 10 highlights using OBS Replay Buffer markers [7].
- Batch transcribe audio and apply your saved CaptionFlow preset.
- Run /features/silence-remover.html to eliminate dead audio pauses automatically.
- Export all sequences via Adobe Media Encoder simultaneously.
+-----------------------------------------------------------------------+
|                      BATCH EXPORT SCHEDULE PIPELINE                   |
|                                                                       |
| [ 7 OBS Highlights ] -> [ CaptionFlow Preset ] -> [ Media Encoder ]  |
|                                                          |            |
|                                                          v            |
| [ TikTok ] <--- [ Instagram Reels ] <--- [ YouTube Shorts Feed ]     |
+-----------------------------------------------------------------------+
By streamlining your clipping, subtitling, and rendering stages, you create a sustainable pipeline that drives viewers from short clips back to your live Twitch stream.
Actionable Takeaway: Batch edit and export 7 to 10 highlight clips in a single sequence session to maintain daily short-form uploads across all social platforms.
Frequently Asked Questions

What is the fastest tool to auto-caption Twitch stream clips?
Using an Adobe Premiere Pro extension like KreateFlo lets you transcribe stream audio and apply animated word-by-word captions directly on your sequence timeline in under 90 seconds [5].
How do you keep captions from getting covered by TikTok UI buttons?
Position your text in the safe upper-middle area of the 9:16 vertical sequence canvas [10]. Avoid placing text in the lower third or along the right margin where channel handles, descriptions, and engagement icons sit [7].
Is StreamLadder or Opus Clip better for long Twitch VODs?
Both services charge based on VOD minute credits or impose low monthly caps on long uploads [3]. For multi-hour Twitch VODs, using a native Premiere Pro extension avoids per-minute credit billing entirely while running edits locally [3].
Can you convert Premiere Pro captions into graphic titles for animation?
Yes. Premiere Pro allows you to upgrade standard caption tracks into customizable graphic layers [6]. This grants full keyframe control over custom font styling, drop shadows, stroke outlines, and dynamic word-by-word animations [6].
Does KreateFlo work on standalone web browsers?
No. KreateFlo is a dedicated CEP plugin built exclusively for Adobe Premiere Pro. It is designed for editors who want direct timeline control and local execution without round-trip browser exports.
Stop Wasting VOD Credits and Accelerate Your Timeline
Stop throwing away hours manually scrubbing multi-hour VODs or wasting monthly credit caps on web-based clippers. You can take full control of your stream highlights, animate word-by-word text instantly, and publish higher-quality vertical content directly inside your primary editing workspace.
Download KreateFlo today at /download.html to animate word-by-word stream captions inside Adobe Premiere Pro, or explore our /features/captionflow.html breakdown to see all 22 animated presets in action.
References
- streamladder.com/blog/add-captions-to-twitch-clips
- ssemble.com/blog/how-to-clip-twitch-streams-2026
- cutback.video/blog/how-to-create-animated-captions-in-premiere-pro-(no-after-effects-needed)
- streamladder.com/clip-editor/captions
- youtube.com/watch
- youtube.com/watch
- eklipse.gg/features/stream-clip-workflow/
- opus.pro/research/best-caption-strategy-marketing-ads
- influenceraiagents.com/for/twitch-streamers
- presenc.ai/research/best-ai-tools-for-twitch-streamers-2026
- digitalapplied.com/blog/video-marketing-statistics-2026-data-points
- submagic.co/apps/opus-pro
- streamladder.com/clipgpt/auto-clip/twitch
- mootion.com/use-cases/en/ai-livestream-highlight-tool
- capcut.com/resource/opus-clip
- youtube.com/watch
- storyflow.so/blog/best-ai-tools-twitch-streamers-2026
- viddyflow.com/tools/ai-twitch-clip-generator/
- streamgen.cc
- makeaivideo.ai/blog/best-twitch-clip-makers-2026
- clipbot.tv/blog/clipbot-vs-captions-comparison-twitch-highlights
- eklipse.gg/features/automate-stream-clips/
- frostytools.com/blog/best-stream-highlight-tools-for-content-creators/
Try KreateFlo free
3 tools forever, 7-day trial on the rest. No credit card to start.
Download KreateFlo