Animated Captions: 7 Proven Video Editing Tips for 2026
Most editors think bouncing text is a cheap TikTok visual trick. But when 85% of social videos are watched on mute and viewers scroll past static subtitles in under 2 seconds, kinetic text isn't an ae
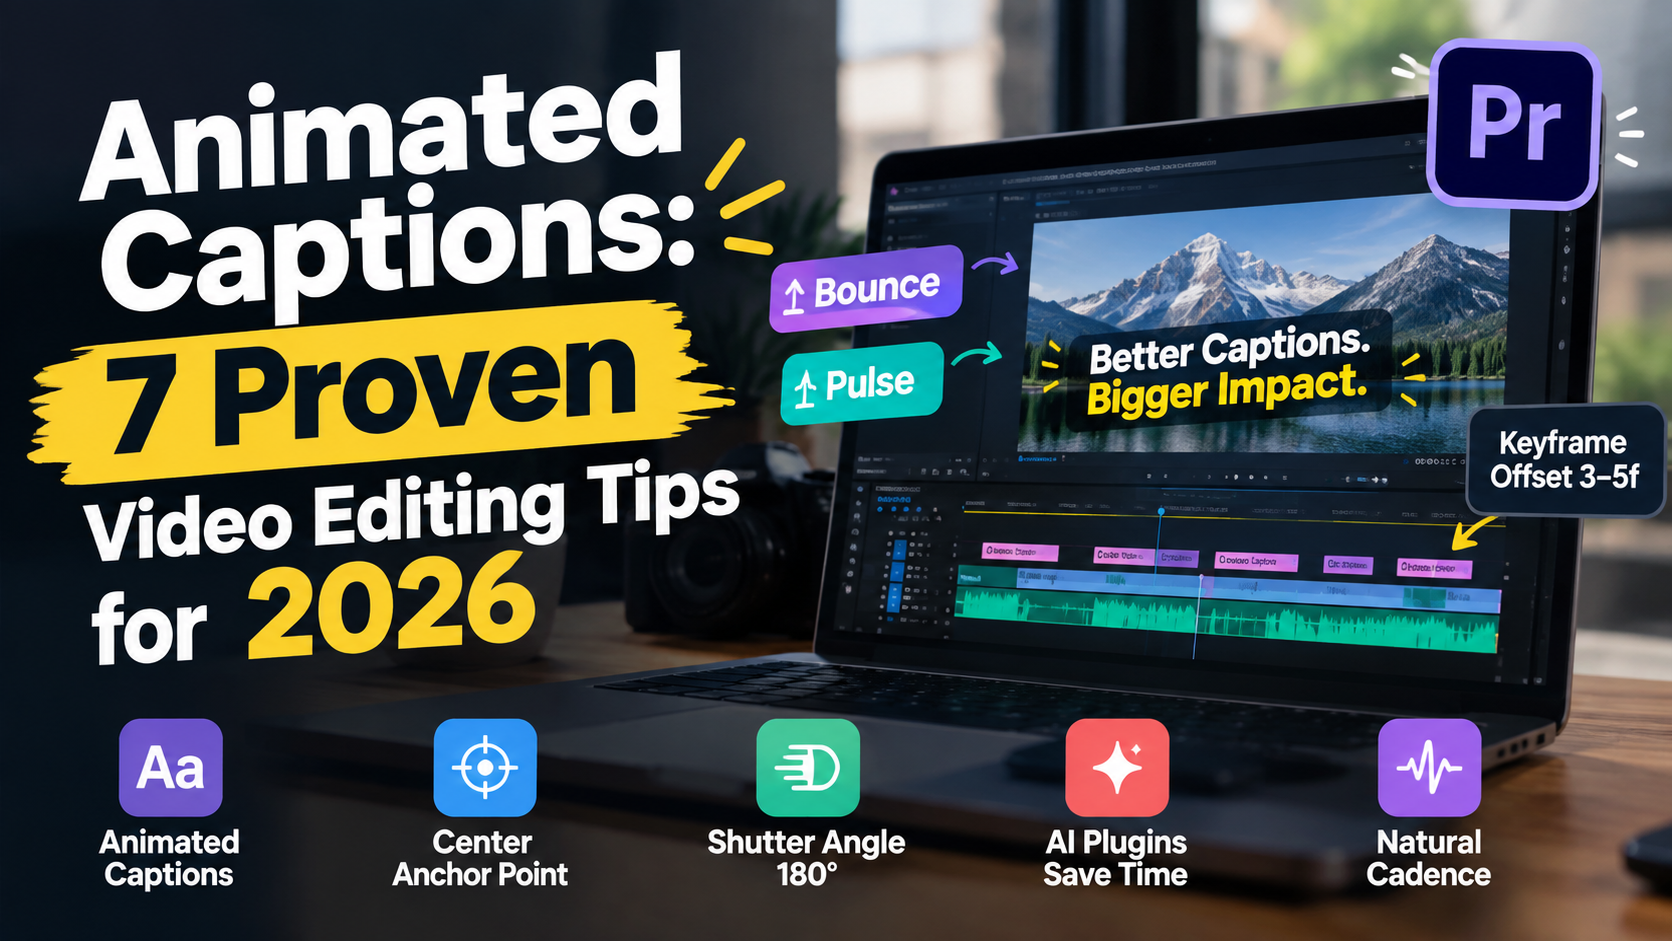
Most editors think bouncing text is a cheap TikTok visual trick. But when 85% of social videos are watched on mute and viewers scroll past static subtitles in under 2 seconds, kinetic text isn't an aesthetic choice—it's survival.
If you are still slicing speech clips frame-by-frame in Adobe Premiere Pro to manually keyframe scale pops, you are throwing away 4 hours on every single podcast episode.
Key Takeaways
Over 80% of top-performing short-form clips use animated captions rather than static subtitles.
Bounce animations create entrance momentum; pulse animations draw attention to key calls-to-action without disrupting speech flow.
Always center text anchor points before adjusting position or scale keyframes to prevent off-axis text expansion.
Uncheck "Use Composition Shutter Angle" in Premiere Pro's Transform effect and set the shutter angle to 180 for realistic motion blur.
Manual keyframing takes 3 to 4 hours per minute of video, whereas Premiere Pro AI plugins like KreateFlo shorten the process to 90 seconds.
Keep keyframe offsets between 3 to 5 frames to match natural speech cadence without causing visual fatigue.
The Math Behind Animated Captions: Why Static Subtitles Fail
Static subtitles used to be enough for YouTube closed captions and foreign film translation. On modern vertical video feeds, static blocks are invisible.
The human brain processes visual movement 60,000 times faster than static text. When an unmoving text box sits at the bottom of a 9:16 frame, the viewer's brain registers it as background clutter and moves on.
In a research study analyzing 13.5 million short-form clips [1], 80.2% of high-retention videos utilized subtitles. Out of those captioned clips, a massive 78.6% relied on animated captions, compared to a mere 1.6% that stuck with static subtitles [1].
| 78.6|Static | NaN |
|---|
The algorithm tracks watch retention curves. Animated captions deliver the precise visual rhythm required to keep users from scrolling away.
The 85% Mute Viewer Problem
Scroll through any social platform in public, and you will see the same reality. People watch videos silently on subway trains, in office breakrooms, and in bed.
Industry tracking shows that 85% of social media videos [4] are watched with the sound muted.
If your dialogue depends on audio alone to convey emotion, you lose four out of five potential viewers instantly. Dynamic captions give silent viewers the exact same narrative momentum that sound design provides to listeners.
In fact, video campaigns utilizing kinetic captions show an 80% higher completion rate [2] and up to 40% longer view durations [3] than uncaptioned clips.
Visual Rhythm and Brain Processing Speed
When an audio waveform hits a peak, your viewer expects a corresponding visual anchor. Bouncing a single word on screen exactly as the speaker utters a hard consonant creates psychological synchronization.
This visual beat keeps the viewer's focal point locked to the center of the frame.
Data from TikTok ad performance studies reveals that videos featuring synchronized dynamic captions generate a 95% boost in brand affinity [4] alongside a 58% increase in message recall [4]. Viewers do not read the words passive; they absorb the cadence of the conversation.
Actionable Takeaway: Audit your short-form video retention graphs in YouTube Studio or TikTok Analytics. Replace static bottom-third subtitle blocks with word-by-word kinetic animations to flatten retention dips.
Using Bounce and Pulse Animations to Highlight Key Video Words: Key Differences
Not all text animations serve the same purpose. I often see beginner editors throw random keyframes at text layers hoping something works.
To build a professional brand identity for a podcast or agency client, you must distinguish between entrance momentum and mid-sentence emphasis.
Bounce Animation (Entrance Pop):
Frame 0: Scale 0%  ---> Frame 3: Scale 115% ---> Frame 6: Scale 100%
Result: Energetic pop-in as the speaker utters the word.

Pulse Animation (Emphasis Highlight):
Frame 0: Scale 100% ---> Frame 5: Scale 120% ---> Frame 10: Scale 100%
Result: Smooth expansion on an already visible word during emphasis.
What Is a Word Bounce Animation?
A bounce animation controls the entrance of a spoken word onto the screen. As the speaker says a word, the text layer scales rapidly from 0% to an overshoot size—typically 115% or 120%—before snapping back to its natural 100% scale over 3 to 6 frames.
This overshoot mimics elastic physics, giving the text weight and impact.
Bounce pop-ins work best for fast-paced dialogues, high-energy hooks, and rapid-fire tips. They tell the brain that new information has arrived.
What Is a Word Pulse Animation?
A pulse animation targets a word that is already sitting on screen. Instead of entering from zero, the word scales up smoothly from 100% to 120% and contracts back to 100% while remaining visible.
Use pulse animations to draw attention to critical anchor terms—like dollar amounts, key metrics, names, or calls-to-action. They work without interrupting the reading flow of the sentence.
While bounce pop-ins create entrance momentum, web editor motion guidelines show that web-based pulse intensity controls [8] allow editors to highlight takeaway terms without causing visual jitter.
When to Combine Bounce, Pulse, and Karaoke Color Fills
The highest-performing caption styles combine structural pop-ins with secondary visual cues.
When you pair a word-by-word bounce pop-in with dynamic text color changes, you create what editors call the karaoke effect.
Animation Style | Primary Use Case | Recommended Keyframe Offset | Visual Effect |
|---|---|---|---|
Word Bounce | Dialogue entrances, fast hooks | 3–5 frames overshoot | Scale pop from 0% to 115% to 100% |
Word Pulse | Key metrics, anchor words, CTAs | 6–10 frames ease-in-out | Scale expand from 100% to 125% to 100% |
Karaoke Fill | Multi-word sentence tracking | Synchronized to speech audio | Text color changes as spoken |
Highlight Pill | Maximum contrast for core takeaway | Static background padding | High-contrast box behind active word |
Integrating karaoke color fills and background highlight pills [10] establishes clear visual hierarchy. The viewer instantly knows which word is active and why it matters to the story.
Actionable Takeaway: Use bounce animations strictly for word entrances on fast clips, and reserve pulse animations for highlighting high-value metrics or calls-to-action in multi-word sentences.
How to Build Word-by-Word Bounce Animations in Adobe Premiere Pro Manually
If you want to construct kinetic text manually inside Adobe Premiere Pro, standard Essential Graphics position parameters won't cut it. Standard scale transforms look robotic because Premiere Pro processes spatial keyframes linearly by default.
To get organic movement, you must use the Transform video effect.
Adobe Premiere Pro Manual Bounce Workflow:
[Essential Graphics Text Layer]
       |
       +--> Apply "Transform" Effect
       |
       +--> Align Effect Anchor Point to Word Center
       |
       +--> Keyframe Scale: 0% -> 115% -> 100% (3-5 frame gaps)
       |
       +--> Uncheck "Use Composition Shutter Angle"
       |
       +--> Set Shutter Angle to 180 degrees (Motion Blur)
Setting Anchor Points to Text Center
The single biggest mistake editors make when manually keyframing text is ignoring the anchor point.
If your anchor point sits at the bottom-left corner of your graphic frame, scaling the word from 0% to 115% will cause the text to expand diagonally upward to the right. It flies completely out of position.
Here is how to lock it down:
Select your text layer in the timeline and open the Effect Controls panel.
Locate the Anchor Point parameter under the Transform effect (not the Motion header).
Drag the anchor point crosshair directly to the geometric center of the specific word you are animating.
Adjust the Position property to re-center the word inside your video frame.
Aligning text layer anchor points to the exact center ensures that slider-controlled wiggle expressions [7] and manual scale adjustments expand evenly in all directions.
Applying the Transform Effect and Scale Keyframes
Once your anchor point is locked to the center, build the overshoot bounce sequence. Avoid using the standard Motion tab scale, as it lacks shutter angle capabilities for motion blur.
Follow these steps:
Open the Effects panel, search for Transform, and drop it onto your text clip.
Move your timeline playhead to the exact frame where the speaker begins pronouncing the word.
Set a keyframe for Scale at 0%.
Move forward 3 frames in the timeline and set a keyframe for Scale at 115%.
Move forward 3 more frames (frame 6 total) and set a keyframe for Scale at 100%.
Select all three keyframes, right-click, and select Temporal Interpolation > Bezier or Auto Bezier to smooth the velocity curve.
Following standard Transform effect keyframing tutorials [5], offsetting scale keyframes by 3 to 5 frames provides the ideal balance between snappy pop-ins and readable movement.
Pro Tip: In After Effects, you can automate this movement using bounce-and-overshoot keyframe scripts [6] or expressions like value + [s,s] * Math.sin(freq*t*Math.PI). Inside Premiere Pro, native expression support for graphic layers remains limited, making manual keyframing or dedicated plugins necessary.
Adding Motion Blur with Custom Shutter Angles
A scale pop without motion blur looks harsh and digital. Real camera lenses capture motion blur whenever objects move rapidly across the sensor.
You can replicate this lens physics directly inside Premiere Pro's Transform panel.
In the Transform effect controls, scroll down to the bottom of the property list. Uncheck the box labeled Use Composition's Shutter Angle.
Once unchecked, manually set the Shutter Angle value to 180 (or 360 for an exaggerated cinematic blur).
Transform Effect Settings:
- Position: [Centered]
- Scale Keyframes: 0% (f0) -> 115% (f3) -> 100% (f6)
- [ ] Use Composition's Shutter Angle
- Shutter Angle: 180.0°
This tweak introduces directional motion blur during those 3 frames of scale expansion. It makes the word bounce feel smooth to the human eye.
Actionable Takeaway: Always apply the Transform effect rather than the Motion tab in Premiere Pro. Uncheck composition shutter angle, and dial shutter angle to 180 to add motion blur to manual bounces.
Using Bounce and Pulse Animations to Highlight Key Video Words Without Spending 4 Hours
Manual keyframing works fine if you produce a single 15-second teaser once a month.
But what if you edit 4 long-form podcast episodes a week and need to slice them into 20 short-form clips for Instagram Reels and TikTok? Keyframing every word manually is an absolute nightmare.
The Problem with Frame-by-Frame Slicing
To animate captions word-by-word manually in Premiere Pro, you have to perform a grueling sequence of timeline actions:
Transcribe the audio track.
Create a graphic text layer.
Razor-blade the text layer at every single word boundary.
Re-type or split the text so only one or two words show per block.
Center the anchor point for every cut piece.
Copy and paste Transform keyframe parameters across hundreds of tiny graphic clips.
On a typical 60-second vertical clip containing 160 spoken words, doing this manually takes between 3 and 4 hours of tedious clicking.
If you make a mistake or the client requests a copy edit, you have to start the keyframing process all over again.
| Before | 4 Hours |
|---|---|
| After | 90 Seconds |
Real-Time WASM Preview vs Render Loops
This exact frustration is why we built CaptionFlow inside KreateFlo.
KreateFlo runs as a native CEP panel plugin inside Adobe Premiere Pro (current version v1.0.3). Instead of kicking you out to an external browser app, it processes your audio track directly on your sequence.
CaptionFlow uses a WebAssembly (WASM) rendering engine. In traditional Premiere workflows or clunky MOGRT templates, changing a font style or animation preset forces Premiere to re-render the graphic track. That creates annoying progress bars and rendering lag.
With WASM real-time preview, you can select from 22 animated caption presets—including word bounce, pulse highlight, and karaoke styles—and watch the animations play back instantly at full frame rate without render delays.
Traditional MOGRT / Manual Workflow:
Edit Audio -> Cut Clips -> Add Keyframes -> Render Preview (30s) -> Spot Error -> Re-render

KreateFlo WASM Workflow:
Select Track -> Pick Preset -> Instant WASM Preview -> Click Apply (90 seconds total)
Comparing Flat Monthly Pricing to Per-Hour Plugins
When choosing an editing automation tool for Premiere Pro, the pricing structure matters as much as feature depth.
Many competing tools rely on confusing per-hour meter billing or push you into web ecosystems that break your NLE timeline structure.
Feature / Metric | Manual Premiere Pro | KreateFlo (v1.0.3) | FireCut | Descript |
|---|---|---|---|---|
Workflow Location | Native Timeline | Native CEP Plugin | Native CEP Plugin | Web App / Standalone |
Time per 60s Clip | 3–4 Hours | ~90 Seconds | ~90 Seconds | ~5–10 Minutes |
Pricing Model | Free (Included with Premiere) | $19.99/mo (Pro) / Free Tier | Per-hour usage credits | $12–$24/user/mo |
AI Processing Allowance | N/A | 20 AI Hours (Pro) / 50 hrs (Studio) | Metered credit drain | Metered transcription |
Preset Flexibility | Fully manual | 22 WASM Presets | Fixed MOGRT presets | Limited canvas styles |
Real-Time Preview | Render required | WASM Instant | Render required | Canvas playback |
Web tools like Descript force you to export audio, edit text in a browser canvas, and re-export XML sequences back to Premiere. That round-trip breaks your color grade, audio effects, and nested sequences.
On the plugin side, tools like FireCut bill you based on strict per-hour credit consumption. If you edit 30 hours of raw interview footage a month, usage-based billing gets expensive fast.
KreateFlo gives you a transparent $19.99/mo Pro plan packed with 20 AI processing hours, or a $44.99/mo Studio plan with 50 AI hours. Plus, our Free tier gives you 3 core tools forever (Silence Remover, Transition Assistant, and Copy & Paste) without entering a credit card.
Actionable Takeaway: Stop wasting 4 hours on manual timeline slicing. Test an automated workflow using KreateFlo's CaptionFlow tool to apply word-level bounce presets across your entire sequence in under 90 seconds.
5 Design Rules for Kinetic Captions That Don't Annoy Your Audience
While animated captions drive viewer engagement, poor design choices ruin production value. I see plenty of editors over-animate their clips until the screen looks like a chaotic video game.
Follow these five practical rules to keep your kinetic text professional.
Visual Hierarchy Rule:
[ Main Video Subject ] ---------> Primary Focus
       |
[ Subtle Text Baseline ] -------> Clean Readable Font (Montserrat / Inter)
       |
[ Animated Highlight Word ] ----> Bounce + High Contrast Fill (Yellow/Green)
1. Practice Selective Retention Styling
Do not bounce every single word in a 30-second sentence. If every syllable pops, shakes, and flashes, nothing stands out.
Visual fatigue sets in after 5 seconds, and high-ticket clients or B2B audiences will switch off.
Keep standard conversational filler words clean and neutral. Reserve high-energy bounce animations for sentence hooks, and use pulse scale pops exclusively for key data points, core arguments, or punchlines.
As noted in short-form video retention studies [9], overusing aggressive movement degrades brand authority in corporate or educational content.
2. Manage Motion Blur and Font Contrast
Always choose a heavy, highly readable sans-serif typeface. Thin scripts or decorative serif fonts disintegrate when motion blur is applied during scale pops.
Recommended Fonts: Montserrat (Black), Inter (Extra Bold), Futura (Bold), Proxima Nova (Black).
Stroke & Shadow: Add a 12px to 18px black stroke or a tight 80% opacity drop shadow behind white text to preserve contrast against bright background footage.
Color Palette: Stick to two text colors max (e.g., White for standard speech, High-Visibility Yellow or Electric Green for active bounce words).
3. Respect Mobile UI Safe Zones
Every social platform overlays native user interface buttons—like hearts, comment bubbles, share arrows, and account captions—directly over your video frame.
If your animated captions sit too low or expand too far to the margins, the platform UI blocks your text.
+-----------------------------------+
|          TOP SAFE ZONE            |  <-- Avoid top header icons
|                                   |
|                                   |
|       OPTIMAL CAPTION ZONE        |  <-- Center-middle or lower-middle
|       [ Kinetic Text Here ]       |      (1080x1920 canvas)
|                                   |
|                                   |
|         BOTTOM SAFE ZONE          |  <-- Avoid TikTok/Reels overlays
+-----------------------------------+
Keep your animated graphic layers strictly inside the 9:16 vertical safe zone: at least 250 pixels up from the bottom edge and 120 pixels in from the side borders.
4. Match Animation Speed to Speech Tempo
Sync your scale keyframe durations to the speaker's cadence.
If your guest speaks fast, keep keyframe transition gaps tight (2 to 3 frames). If your speaker has a slow, deliberate delivery, stretch the bounce ease-in curve across 5 to 7 frames.
Desynchronized caption timing breaks reading flow because human eyes track visual movement faster than spoken dialogue.
5. Never Hide the Speaker's Face
Position your caption block across the chest or lower-third area of the speaker.
Never allow scale pops or background highlight boxes to expand upward over the speaker's mouth or eyes. Viewers track facial expressions to read emotion; covering eyes with bouncing text tanks audience retention.
Actionable Takeaway: Restrict high-contrast bounce and pulse animations to emphasis words, select heavy sans-serif fonts, and lock text placement inside 9:16 mobile safe zones.
Using Bounce and Pulse Animations to Highlight Key Video Words Across Platforms
Content formats dictate animation aggressiveness. What works for a viral TikTok clip looks ridiculous on a corporate LinkedIn post or an in-depth YouTube documentary.
Short-Form Vertical Video (TikTok, Shorts, Reels)
Vertical short-form is fast and aggressive. Viewers give you less than 1.5 seconds to prove your video is worth watching.
Caption Strategy: Single-word or two-word pop-ins positioned dead-center.
Animation Style: Fast word-by-word bounce pop-ins (3-frame scale overshoot) paired with high-contrast background highlight pills.
Color Rules: Bright yellow or neon green active highlights on bold white text.
Long-Form YouTube Videos and Podcasts
Long-form audiences want to relax and absorb deep conversations. Non-stop central word bouncing will irritate people watching a 45-minute interview on a desktop monitor or TV screen.
Caption Strategy: Two-line lower-third subtitle blocks that track speech naturally.
Animation Style: Karaoke text fill for active sentence tracking, with subtle pulse scale pops (110% scale max) reserved for major chapter headings or emphasis quotes.
Color Rules: Clean white text with subtle opacity transitions.
LinkedIn and Corporate B2B Content
LinkedIn users watch videos at work, often with desktop audio disabled. B2B audiences value clarity and authority over hyperactive visual tricks.
Caption Strategy: Multi-word sentence blocks placed cleanly in the lower third.
Animation Style: Subtle pulse scale expansion applied exclusively to core metrics, dollar values, or company names.
Color Rules: Navy, slate gray, or brand-specific accent colors that align with corporate design guidelines.
80% watched without sound
Data tracking proves that 80% of LinkedIn videos [4] are viewed on mute. Delivering clean pulse highlights on key data points ensures your message gets across without looking childish.
Actionable Takeaway: Match your caption animation aggressiveness to the target platform. Use energetic center-screen bounce pops for vertical short-form, and subtle lower-third pulse highlights for long-form and B2B feeds.
When Manual Keyframing (and KreateFlo) Is the Wrong Choice
I believe in using the right tool for the job.
While KreateFlo and dynamic keyframing excel at short-form social clips, podcasts, and digital marketing content, there are specific workflows where kinetic text is the wrong approach entirely.
Cinematic Documentaries and Narrative Films
If you edit indie feature films, high-end narrative content, or broadcast television documentaries, kinetic bounce captions do not belong on your timeline.
Broadcast delivery standards require standardized, non-distracting closed caption tracks (like SCC or SRT sidecar files) that viewers can toggle on and off. Bouncing text ruins cinematic immersion and violates FCC accessibility guidelines for television delivery.
Offline Web-Based Workflows
If you are a solo creator who edits entirely on a Chromebook, iPad, or browser-based interface without Adobe software, KreateFlo is not for you.
KreateFlo is a dedicated Adobe Premiere Pro CEP plugin designed specifically for editors who live inside Premiere daily. If you do not use Premiere Pro, standalone web apps like Descript or Opus Clip are better suited for your web-browser setup.
Choosing the Right Tool for Your NLE Setup
If you do edit daily in Premiere Pro, piling on multiple standalone web tools creates unnecessary friction. Exporting XMLs, re-linking media, and re-rendering audio tracks wastes time you could spend cutting video.
Complete Premiere Pro Timeline Workflow with KreateFlo:
1. Cut Rough Dialogue Track
2. Run Silence Remover (Strip dead air automatically)
3. Run Multi-Cam Editor (Auto-switch up to 8 cameras)
4. Apply CaptionFlow (Generate 22 WASM kinetic caption presets)
5. Export Final Render (Zero XML round-tripping)
By keeping your automated workflow directly on your Premiere timeline, you can combine KreateFlo's Silence Remover tool with CaptionFlow to strip dead air and generate word-level kinetic captions in a single pass.
Actionable Takeaway: Stick to static broadcast SRT captions for narrative films. Leverage native Premiere Pro plugins like KreateFlo when speed and retention matter for social video workflows.
Frequently Asked Questions

How do you create a bounce text animation in Adobe Premiere Pro?
Apply the Transform effect to your text clip in Premiere Pro, center the anchor point on the word, and set three scale keyframes: 0% at the start, 115% after 3 frames, and 100% at frame 6. Uncheck "Use Composition Shutter Angle" and set the shutter angle to 180 to add realistic motion blur.
What is the difference between bounce and pulse caption animations?
A bounce animation scales a word up rapidly from zero to an overshoot size as it enters the screen, creating entrance momentum. A pulse animation takes a word that is already visible on screen and smoothly expands and contracts its scale to highlight emphasis without interrupting reading flow.
Why are animated captions better than static subtitles for video retention?
The human eye processes visual movement much faster than unmoving text. Animated captions create a visual rhythm synchronized to spoken audio waveforms, guiding the viewer's focal point and generating up to 80% higher completion rates on muted mobile feeds.
How do I animate captions word-by-word without manual keyframing?
You can use native Adobe Premiere Pro AI plugins like KreateFlo (specifically the CaptionFlow tool). It transcribes audio automatically, slices speech at the word level, and applies customizable bounce, pulse, and karaoke presets across your timeline in under 90 seconds.
Will word-level bounce animations clutter serious or B2B videos?
They will if applied to every single word. For B2B or corporate content, practice selective retention styling: keep standard dialogue subtitled cleanly, and apply subtle pulse scale highlights strictly to key data points, anchor metrics, or calls-to-action.
Automate Your Caption Workflow in Premiere Pro Today
Kinetic text animations are no longer optional if you want your short-form video content to perform on modern social feeds.
You can spend 4 hours manually slicing graphic clips and adjusting Transform keyframes in Premiere Pro, or you can automate word-level timing in 90 seconds.
Test out KreateFlo's free tier with 3 lifetime tools (Silence Remover, Transition Assistant, and Copy & Paste), or upgrade to Pro ($19.99/mo) for full CaptionFlow access with 22 WASM animated presets.
Download KreateFlo for Adobe Premiere Pro and stop wasting time on manual keyframes.
References
vsubtitle.com/how-brands-increase-video-engagement-captions/
lemonlight.com/blog/how-video-captions-help-attract-and-engage-more-users/
thebreezycompany.co/article/video-storytelling-website-engagement-stats/
educationalvoice.co.uk/animation-retention-rates-statistics/
vikimediatec.com/top-video-editing-trends-in-2026-every-creator-should-know/
senatemedia.co.uk/2026/02/from-vivid-gradients-to-liquid-glass-key-animation-trends-for-2026/
Try KreateFlo free
3 tools forever, 7-day trial on the rest. No credit card to start.
Download KreateFlo