Hormozi Captions Premiere Pro: Ultimate 90-Second Guide
Spending four hours splitting native subtitle tracks into graphic layers just for word-level highlights will break your spirit. Adobe Premiere Pro is my primary NLE every single day, but manually keyf
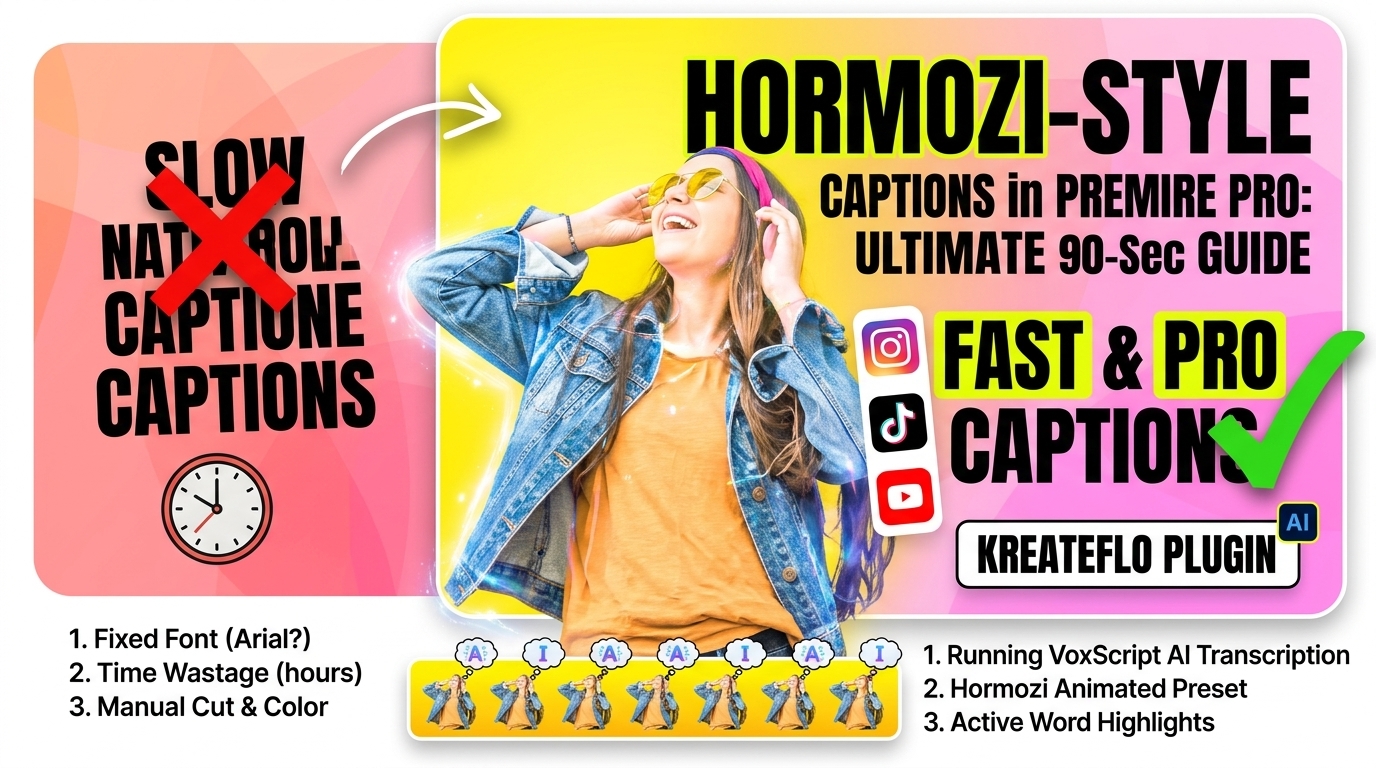
Spending four hours splitting native subtitle tracks into graphic layers just for word-level highlights will break your spirit. Adobe Premiere Pro is my primary NLE every single day, but manually keyframing yellow text pops and black strokes for a short video clip is pure torture. I tested CaptionFlow inside KreateFlo v1.0.3, and it cuts that multi-hour caption slog down to about 90 seconds.
Key Takeaways
- Manual Hormozi captions in Adobe Premiere Pro take hours, but CaptionFlow automates the entire process in under 90 seconds [1].
- CaptionFlow bundles 22 animated presets into Premiere Pro, including Hormozi, Pop, Beast, and Karaoke styles [1].
- The built-in JASSUB WebAssembly (WASM) preview engine renders style tweaks instantly without timeline rendering [1].
- VoxScript AI handles speech-to-text transcription across 97+ languages with exact word-level timestamp accuracy [1], [2].
- Nudging caption clips 2 to 3 frames to the left aligns visual pop animations tightly with spoken audio delivery [3].
- KreateFlo is a dedicated Premiere Pro CEP plugin ($19.99/mo for Pro) that includes 33+ tools and 3 free tools forever [2].
The Native Premiere Subtitle Problem (Why Manual Captions Waste Hours)
You finish cutting a 45-minute video podcast. Your client asks for three 60-second vertical reels for TikTok and Instagram Reels with "that Alex Hormozi subtitle style." You open Adobe Premiere Pro, run speech-to-text, and generate a native subtitle track.
Then the headache starts.
1. Native Subtitle Track Formatting Limits
Native subtitle tracks in Premiere Pro live on locked caption tracks at the top of your timeline. They are designed for closed captioning on TV screens, not punchy social media clips [6].
You cannot animate individual words on a native caption track [5]. You cannot scale up a single active word when spoken [3]. Furthermore, you cannot apply neon yellow or bright green fill colors to one word while leaving the rest of the sentence white [3].
To build kinetic text natively, you must convert your caption track into essential graphic text layers [5]. Once converted, every line becomes a graphic clip on your video tracks [3], [5].
2. The Repetitive Cut-and-Color Workflow
Building Alex Hormozi style captions manually in Premiere Pro [3] forces you into a brutal cut-and-color loop:
- Place your playhead at the exact start of a spoken word.
- Press
Ctrl+K(Cmd+Kon Mac) to split the graphic text clip on the timeline [3]. - Select the Type tool, double-click the text inside the Program Monitor, and highlight the single spoken word [3].
- Change the font size from 80 to 90 to create a size pop [3].
- Click the Fill color swatch and change the highlight color to bright yellow (
#FFFF00) or green (#00FF00) [3]. - Advance 3 frames to the next spoken word and repeat steps 1 through 5.
Manual Captioning Effort Breakdown:
- Splitting Clips: 45%
- Color Formatting: 35%
- Timing Adjustments: 20%
Doing this for a single 60-second reel means making roughly 150 timeline cuts and over 300 manual color tweaks [3]. On a 10-minute clip, manual captioning takes over 4 hours of tedious clicking [1].
3. Delayed Animations and Visual Lag
When you split text clips precisely on the audio beat, something strange happens during playback. The visual text pop feels slightly late to human eyes [3].
Why does this happen?
Human eyes process visual cues faster than brain sound processing registers spoken audio [3]. If your yellow highlight triggers exactly on the audio transient, the animation feels delayed [3]. To fix visual lag manually, you have to nudge the start frame of every split graphic clip 2 to 3 frames to the left [3]. That adds another 30 minutes of tedious trimming to your edit.
Actionable Takeaway: Stop splitting text layers manually with Cmd+K across your timeline; use dedicated graphic tools to handle word-level highlights automatically [1], [3].
Create Hormozi Style Captions in Premiere Pro with CaptionFlow: Step-by-Step
We built CaptionFlow inside KreateFlo v1.0.3 to eliminate manual keyframing completely [1]. KreateFlo is a CEP extension plugin that runs directly inside Adobe Premiere Pro [2]. It bundles 33+ tools into one panel, taking you from raw transcript to fully animated captions in about 90 seconds [1], [2].
Time Saved: 90 seconds with CaptionFlow vs. 4 hours manually.
Here is the exact step-by-step workflow to generate Hormozi captions inside Premiere Pro.
1. Running VoxScript AI Transcription
First, open the KreateFlo panel inside Premiere Pro (Window > Extensions > KreateFlo). Click on the VoxScript AI tab or launch CaptionFlow directly [1], [2].
Select your active sequence or highlighted audio clips. VoxScript AI analyzes your dialogue track using word-level timestamp accuracy across 97+ supported languages, including English, Spanish, French, Bangla, and Hindi [1], [2].
If you already transcribed your audio in another app, you can drop an .srt or .vtt file directly into the panel [1]. CaptionFlow parses the timestamps instantly [1].
2. Applying the Hormozi Animated Preset
Once your transcription completes, click into the preset library. CaptionFlow includes 22 ready-to-go animated caption presets [1]:
- Hormozi: Bold all-caps text with active word size pops and high-contrast yellow highlights [1], [3].
- Karaoke: Smooth word-by-word color fills across multi-word lines [1].
- Beast: Heavy centered blocks with bold red and yellow accent colors [1].
- Pop & Bounce: Springy scale keyframes on every new word [1], [8].
- TikTok & Neon Glow: Clean vertical layouts with subtle glowing strokes [1], [10].
Select the Hormozi preset [1]. The preview window immediately displays your styled transcript in real time [1].
3. Customizing Active Word Highlights
You have full visual control over every design parameter in the KreateFlo panel [1]:
- Primary Font: Set to a heavy sans-serif like Montserrat Bold or The Bold Font [3], [4].
- Font Size: Set base text to 68px–80px [3].
- Active Word Scale: Enable auto-pop to scale highlighted words by +10% [3].
- Highlight Color: Choose bright yellow (
#FFE600), neon green (#00FF66), or custom brand hex codes [3]. - Stroke & Shadow: Add a 4px black outline with an 80% drop shadow for readability [3], [9], [10].
Click Create Captions on Timeline [1]. CaptionFlow places s voice [1].
Pro Tip: If your speaker stutters or repeats a sentence, run Silence Remover or AI Repeat Removal before generating captions [2]. This cleans up your audio timeline so your text timestamps lock in clean [1], [2].
Actionable Takeaway: Use CaptionFlow to transcribe dialogue, select the Hormozi preset, and push synced graphic clips to your Premiere timeline in 90 seconds [1].
Typography and Color Highlighting Rules for Alex Hormozi Subtitles

Alex Hormozi's iconic subtitle style isn't random. It relies on strict design rules that maximize mobile watch time on muted feeds [3], [4].
If your typography is weak, viewers swipe past your reel. Here are the core visual rules for building high-converting captions [3], [10].
1. Picking Heavy Sans-Serif Fonts
Thin script fonts and decorative serifs fail on vertical video. They turn into pixelated mud when compressed by Instagram or TikTok algorithms [10].
Standard Hormozi typography uses heavy, center-aligned, all-caps sans-serif fonts [3], [4]:
- Montserrat (Bold or ExtraBold): The gold standard for modern short-form video [3].
- The Bold Font: Clean geometric letterforms with thick stems [3], [4].
- Futura Bold / Impact: Classic bold options with excellent character density [3].
Set text transformation to ALL CAPS [3]. Uppercase letters create a uniform rectangular box shape across lines, making individual words easier to read at high playback speeds [3].
2. High-Contrast Strokes and Drop Shadows
White text disappears completely when your speaker walks in front of a white wall or bright window [10].
To guarantee text legibility across dynamic video backgrounds, apply high-contrast outlines [9], [10]:
| Styling Parameter | Recommended Value | Why It Matters |
|---|---|---|
| Font Weight | Bold / ExtraBold / Heavy | Maintains structural legibility at small scale [3] |
| Text Alignment | Center Aligned | Keeps active words balanced on mobile screens [3] |
| Stroke Width | 3px to 5px Solid Black (#000000) |
Creates an absolute boundary against bright backgrounds [9], [10] |
| Drop Shadow Opacity | 80% to 90% | Separates letters from busy background textures [10] |
| Shadow Distance / Softness | 4px Distance / 3px Softness | Prevents muddy dark halos while holding character edges sharp [10] |
If you want to dive deeper into fixing text edge clarity, check our guide on how to fix blurred or low-contrast text captions in Premiere Pro [10].
3. Single-Line Pacing for Vertical Shorts
Never display 4 or 5 lines of text on screen at once [3]. Multi-line paragraph blocks cover your speaker's face and force viewers to read instead of watching your content [3].
Limit your caption display to 1 to 3 words per line [3]. Short single-line phrasing forces viewer eyes to stay locked on the center of the frame, driving higher retention metrics on social feeds [3].
Actionable Takeaway: Combine all-caps Montserrat Bold text with a 4px black stroke, bright yellow highlight fills, and 1 to 3 words per line for optimal mobile retention [3], [9], [10].
How Real-Time WASM Preview Fixes the Render-and-Review Loop
Most third-party caption plugins for Adobe Premiere Pro suffer from a frustrating technical bottleneck: slow rendering loops [1].
1. The Problem with Timeline In-Out Rendering
Traditional MOGRT templates and motion graphics plugins require Premiere Pro to render preview files every time you change a setting [1].
If you adjust font size, tweak stroke thickness, or swap an accent color, Premiere Pro forces a timeline render [1]. You sit and wait for green preview render bars to complete just to check if a word highlight looks right [1]. That render-and-review loop wastes tens of minutes on every short-form project [1].
2. In-Browser WASM Rendering via JASSUB
CaptionFlow solves this render lag using an advanced JASSUB WebAssembly (WASM) preview engine [1].
Workflow Speed Comparison:
- Manual Captioning: 240 Minutes
- CaptionFlow WASM Workflow: 1.5 Minutes
Instead of forcing Premiere Pro to render video preview files on disk, CaptionFlow renders your animated text inside the plugin panel via GPU-accelerated WebAssembly code [1].
Traditional Plugin Workflow:
[ Change Font ] --> [ Render Timeline Preview ] --> [ Wait 30s ] --> [ Check Playback ]

CaptionFlow WASM Workflow:
[ Change Font ] --> [ Instant GPU WASM Preview (0ms Delay) ] --> [ Push to Timeline ]
Because WASM handles text composition in real time, every font swap, stroke adjustment, and timing nudge appears instantly in the preview window [1].
3. Instant Typography Tweaks
You can test 10 different color schemes or toggle between 22 animated presets in seconds [1]. You see exact word-level pop timing before touching your sequence timeline [1].
Once your caption styling looks perfect, push the final graphic clips directly into your Premiere Pro project [1].
Pro Tip: Use the real-time WASM preview to double-check word timing while scrubbing through spoken dialogue [1]. You can adjust individual word boundaries in the panel editor without breaking timeline sequence playback [1].
Actionable Takeaway: Stop waiting for timeline render bars; use WASM-powered plugins to preview caption styling instantly before generating graphics [1].
Create Hormozi Style Captions in Premiere Pro with CaptionFlow vs Competitors
How does KreateFlo compare against other video editing plugins and standalone transcription software? Let's break down the real numbers and workflows.
1. KreateFlo vs Captioneer and CaptionPlug
Tools like Captioneer and CaptionPlug offer caption presets inside Premiere Pro [6], [7]. Captioneer v2.0.0 introduced auto-captions [6], while CaptionPlug provides local Whisper transcription [7].
However, both tools are single-purpose utilities [6], [7]. They style captions, but they won't edit your project [6], [7].
KreateFlo bundles CaptionFlow alongside 33+ professional editing tools inside one single CEP panel [1], [2]:
- AI Multi-Cam Editor (handles up to 8 speakers / 8 cameras with dedicated wide shot designation) [2].
- ClipGenius (finds, scores, and extracts viral clips automatically) [2].
- Silence Remover & AI Filler / Repeat Removal [2].
- Auto-reframing, stock media integration, and transition management [2].
2. Subscription Value: $19.99/mo vs Per-Hour Billing
Competitors like FireCut charge per-hour processing fees on top of base subscription tiers. If you edit 20 hours of raw podcast footage a month, usage fees stack up fast.
KreateFlo uses predictable monthly pricing [2]:
- Free Tier: 3 tools free forever (Silence Remover, Transition Assistant, Copy & Paste) with no credit card required [2].
- Pro Tier ($19.99/mo): Includes 33+ tools, CaptionFlow, AI Multi-Cam, and 20 AI processing hours per month [2].
- Studio Tier ($44.99/mo): Built for content agencies, providing 50 AI processing hours per month [2].
3. Integrated Plugin vs Web App XML Round-Tripping
Web tools like Descript and Opus Clip require exporting XML sequence files, uploading giant video files to external cloud servers, and re-importing projects back into Premiere Pro. Round-tripping destroys custom color grades, breaks nested sequences, and loses complex audio track routing.
KreateFlo lives 100% inside Adobe Premiere Pro [2]. Your media never leaves your local timeline, keeping your project files clean and secure [2].
Actionable Takeaway: Choose integrated CEP plugins like KreateFlo over web round-tripping to keep your sequence structure intact while saving money on subscription costs [1], [2].
Honest Caveats: When KreateFlo Is Not the Right Pick for Your Workflow
We believe in complete honesty with editors. KreateFlo is a powerful tool, but it is not the right choice for every situation.
1. Editors Working Outside Adobe Premiere Pro
KreateFlo is strictly an Adobe Premiere Pro CEP extension plugin [2]. It does not run in DaVinci Resolve, Final Cut Pro, or CapCut. If your primary editing suite is DaVinci Resolve or FCPX, KreateFlo will not work for you.
2. Complex 3D Keyframed Motion Graphics
If your client demands custom 3D element tracking, camera-mapped typography, or advanced After Effects kinetic typography templates, simple caption plugins aren't enough [6]. You will still need Adobe After Effects for heavy 3D keyframe compositing [6].
3. Low-Volume Editors (1 Video per Month)
If you only edit one short video every few months, paying $19.99/mo for an AI plugin subscription might not make sense [2]. You can follow our manual Montserrat Bold cut-and-color steps using Premiere Pro's native Essential Graphics tools for free [3].
KreateFlo is built for high-volume editors—podcast producers, agency teams, YouTube creators, and short-form specialists who edit daily and need to ship fast [2].
Actionable Takeaway: Use native Premiere tools if you edit occasionally; invest in KreateFlo when managing recurring high-volume podcast or social video client pipelines [2], [3].
Best Practices for Syncing Pop Animations and Pacing
To make your Alex Hormozi captions look like they were edited by a top-tier agency, follow these three practical production techniques [3], [10].
1. The 2-Frame Visual Offset Technique
As mentioned earlier, aligning text animations precisely on audio transients causes visual lag [3]. Human eyes anticipate text slightly ahead of spoken audio [3].
When reviewing your generated captions on the timeline, nudge your graphic clips 2 frames to the left [3].
Audio Waveform:    ---[Spoken Word Starts]----------------->
Standard Sync:     ---[Text Highlight Appears]-------------> (Feels late)
2-Frame Offset:  [Text Highlight Appears]-------------------> (Feels snappy)
This 2-frame offset triggers the yellow highlight pop a fraction of a second before the speaker's voice hits the word, making the animation feel razor-sharp [3].
2. Combining Captions with AI Silence Removal
Never style captions over raw, unedited footage [2]. Dead air, awkward pauses, and filler words throw off text timing and ruin reel pacing [2].
Always run Silence Remover first to cut dead space [2]. Once your dialogue timeline is tight and punchy, launch CaptionFlow to transcribe and style your text [1].
3. Direct Burn-In vs SRT File Export
For social media platforms like TikTok, Instagram Reels, and YouTube Shorts, burn your captions directly into the video render [1]. Social feeds auto-mute videos by default, and burned-in graphic captions guarantee your text styling displays identically across every device [1], [10].
For long-form YouTube videos or broadcast web streams, export a separate .srt sidecar file from CaptionFlow [1]. This gives viewers toggleable CC options while providing search engines with readable closed-caption metadata [1].
Actionable Takeaway: Trim dead air with Silence Remover, offset caption graphic start frames by 2 frames left, and burn text into vertical social renders [1], [2], [3].
Frequently Asked Questions
What font does Alex Hormozi use for short-form video subtitles?
Alex Hormozi primarily uses Montserrat Bold, Montserrat ExtraBold, or The Bold Font in all-caps [3], [4]. Text is typically styled with bright yellow (#FFFF00) or green (#00FF00) word highlights, heavy 4px black outlines, and subtle drop shadows [3], [9], [10].
How do you highlight individual words in Premiere Pro captions?
To highlight words manually, split native graphic clips at word boundaries using Cmd+K and change text color frame-by-frame in Essential Graphics [3]. To automate this, use CaptionFlow in KreateFlo to apply word-level color highlights across your entire timeline in seconds [1].
Can you create animated captions in Premiere Pro without After Effects?
Yes. Tools like CaptionFlow render animated text presets, karaoke highlights, and word pops directly inside Premiere Pro using a real-time WebAssembly (WASM) preview engine [1].
What is the difference between native Premiere Pro auto-captions and CaptionFlow?
Native Premiere auto-captions live on fixed subtitle tracks with limited animation and formatting controls [5], [6]. CaptionFlow creates
Is KreateFlo a standalone app or a Premiere Pro extension?
KreateFlo is a dedicated Adobe Premiere Pro CEP extension panel [2]. It runs directly inside Premiere Pro and provides 33+ tools for video and podcast editing [2].
Generating Alex Hormozi style captions shouldn't mean spending four hours manually splitting graphic layers on your timeline [1], [3]. With CaptionFlow, you lock in heavy fonts, dark outlines, and frame-accurate word highlights in under two minutes—all without leaving Premiere Pro [1], [3], [10].
Ready to speed up your editing workflow? Download KreateFlo today to test CaptionFlow and get three editing tools free forever [1], [2].
References
- kreateflo.com/features/caption-flow
- kreateflo.com/features
- adobebasics.com/blogs/news/alex-hormozi-subtitles-premiere-pro
- youtube.com/watch
- youtube.com/watch
- exchange.adobe.com/apps/cc/202497/captioneer-14-day-free-trial
- captionplug.com
- youtube.com/watch
- youtube.com/watch
- kreateflo.com/blog/how-to-fix-blurred-or-low-contrast-text-captions-in-premiere-pro
- sonix.ai/resources/subtitle-generation-trends/
- kreateflo.com/blog/using-bounce-and-pulse-animations-to-highlight-key-video-words-1
- ascynd.io/en/blog/hormozi-captions
- kreateflo.com/blog/how-to-sync-caption-animations-to-video-beats-in-premiere
- storycut.com/features/hormozi-captions
- kreateflo.com/blog/which-caption-styles-increase-watch-time-on-social-platforms
- opus.pro/research/best-caption-strategy-marketing-ads
- captionplug.com/guides/premiere-pro-captions
Try KreateFlo free
3 tools forever, 7-day trial on the rest. No credit card to start.
Download KreateFlo